Strawberry Pie, With Spirit

There’s something magical about strawberry season.  It means that summer has arrived, bringing with it a bounty that’s as striking as it is scrumptious.  A strawberry can quench our thirst, satisfy a sweet tooth, and remind us that vibrant beauty is a free gift of nature.

Sliced pieBut despite all this allure, something has always bothered me about strawberries when they are in the form of pie – at least, the type where a plain, pale crust and a mound of uncooked, whole strawberries are as creative as it gets. I’ve long wondered, Can anything be a pie when it’s sitting in a crust? Why not just eat a bowl of strawberries?  That’s not to say that a pile of berries isn’t delicious, but rather, that there are countless other ways to showcase their appeal. So after some conveniently edible trial and error, I created a refreshing dessert made with lots of vanilla beans, minimal oven time, and a generous splash of spiced rum: strawberry pie, with spirit!

Below is the original recipe post from 2012. Please visit the new and improved recipe, which includes further details, more photos of steps, tips, and honed ingredient ratios.  

Strawberry Vanilla Bean Rum Pie (serves 8-10) 

Crust:

  • 5 ounces (9 full crackers/1 Piesleeve) graham crackers
  • 1 ounce almonds (about 1/4 cup)
  • Seeds scraped from 2 large vanilla beans
  • 1/3 cup melted butter (plus a few drops more if too dry)
  • 3.5 ounces white chocolate in small pieces
  • Scant 2 Tbsp butter at room temperature

Preheat oven to 350 F. Grease a 9” pie pan (preferably glass) with butter. Pulse first three ingredients in a food processor until evenly crushed, then add melted butter and pulse for a few more seconds. If too dry, add a little more melted butter. Evenly push into greased prepared pan and bake at 350 F for 14-16 minutes. Remove crust and turn off oven. While crust cools for a few minutes, melt the white chocolate in 15 second intervals in the microwave, stirring in between. Once smooth, stop heating (it should only take 2 or 3 times in the microwave), whisk in butter until smooth, and carefully spread it into bottom and lower sides of the warm crust (this will prevent the crust from getting soggy once the filling sits in it). Place in fridge to completely cool.

Pouring the filling into the white chocolate lined crustMeanwhile, make the filling:

  • About 1 lb. 13 oz. fresh strawberries, or 2 standard square baskets
  • 1/2 cup sugar, divided
  • 1 Tbsp lemon juice
  • 3 Tbsp cornstarch
  • 2 eggs
  • 2 egg yolks
  • ¼ cup spiced or dark rum
  • Seeds scraped from 2 large vanilla beans

Hull and half the strawberries directly into a medium saucepan (you’ll lose a couple of ounces in weight, which is fine). Top with lemon juice and ¼ cup sugar. Cook over medium-low heat, stirring occasionally.  After 10 minutes, slowly sift the cornstarch over the berries, stirring it in completely, then keep stirring occasionally.  Meanwhile, start working on the custard: Whisk together the remaining 1/4 cup sugar and last four  ingredients in a large heatproof bowl and set over a pot of simmering water. Whisk constantly, until custard is thick enough to hold a deep trail, about the consistency of sour cream. This should take about 10 minutes.  Remove strawberry pan from heat; remove custard from heat and keep whisking while bowl cools a bit.  After a few minutes, use a whisk to push the strawberries through a sieve onto the custard, being sure to scrape the back of the sieve. Mix the strawberries and custard by hand until even in color and consistency.  Pour into cooled pie shell.  Refrigerate for at least 5 hours or overnight, serving within 24 hours.

Within a few hours of serving, make the whipped cream topping:Spreading whipped cream over pie

  • 1 cup heavy whipping cream
  • Seeds scraped from 1/2 vanilla bean
  • 2-3 Tablespoons sugar
  • ½ teaspoon rum

Beat all ingredients on high until stiff. Pipe or spread evenly over pie. Decorate with strawberries if desired. Keep chilled and eat within 2-3 hours.

Cool, refreshing and flavorful, this pie satisfies several cravings in one bite. The hint of rum really intensifies the vanilla bean, which itself gives the tart strawberries a boost of complementary warmth. The texture is creamy, velvety and speckled with tiny seeds that offer a welcome burst of summer to both the belly and the spirit.

Take a bite
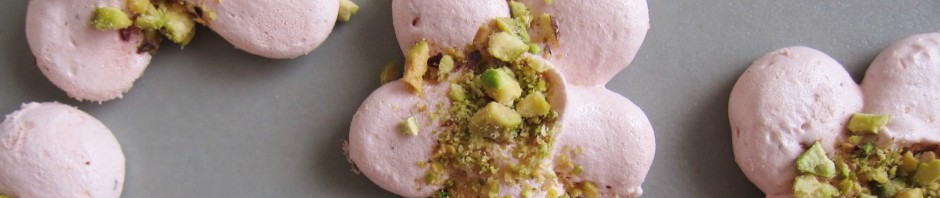
Maybe next time… This recipe can be made gluten-free by simply using gluten-free graham crackers or gingersnaps in the crust. To make it dairy free, use coconut oil in place of all butter, dark dairy-free chocolate in place of white, and a meringue topping like the one I made here instead of whipped cream (be sure to replace the liquid in the syrup with a mixture of rum, vanilla, and strained berry juice).  Finally, if you can find vanilla bean paste, it’s much easier than scraping all the vanilla bean pods, is just as delicious, and a little bit goes a long way.

Berry on pie

Posted in Baking with Spirits, Pies, Tarts, Tortes & Cheesecakes, Sweets | Tagged , , , , , , , , , , , , , , , , , , , , , , , | 9 Comments

Cranberry Clove Cookies

After each visit to see family for the holidays, my husband and I are ever grateful to head home with full bellies and a car packed with leftovers, from stuffing and gravy to containers of cranberry sauce. My soon-after-Thanksgiving tradition has become not one of shopping, nor of eating turkey sandwiches, but of transforming the leftovers into a holiday treat: spice cookies made with cranberry sauce.  [This post was originally published in the summer, when I found a can of cranberry in my cupboard. Original version follows.]

Bitten cranberry cookieI know what you’re thinking: Cranberry clove cookies in June? They sound so wintery!  And you’re right – there’s an abundance of dessert-potential in the fresh, seasonal produce right now; farmers markets are bustling with berries and fruits that simply taste like summer.  (I’ve been experimenting with them, trust me! Recipes coming soon.)  But when I found a can of cranberry sauce in the back of our cupboard the other day, I couldn’t help but think of making it into these fragrant, luscious cookies. I admit it: the cranberry sauce is a leftover we were sent home with at Thanksgiving or Christmastime, but the strange stuff lasts forever, and I surely won’t use it otherwise.  Besides, these cookies are delicious any time of year, with their spice and tang and sweetness.  Here’s how I made them.

Cranberry Clove Cookies (makes about 48)Filling the centers

  • 1 cup butter, at room temperature
  • Scant 1/2 cup sugar
  • 2 cups flour
  • 1 teaspoon ground cloves
  • 1/2 teaspoon salt
  • 1/2 teaspoon vanilla extract
  • finely grated zest of one orange
  • 1/2 cup cranberry sauce

Preheat oven to 325 F. Whisk together the flour, sugar, salt and cloves. Add butter, mixing until dough holds together, then add orange zest and vanilla, mixing until evenly incorporated. Roll into balls Pushing centers inthat are a little smaller than a tablespoon’s worth of dough, placing at least 1½ inches apart on cookie sheets lined with parchment paper.  Press an indentation  into the center of each ball using your index finger, almost to the bottom of the cookie, but not all the way through.

Freeze for 5-10 minutes, then fill indentations with cranberry sauce. (This is easiest by piping the sauce with a pastry bag or plastic bag with corner snipped off.)  Bake for 18-20 minutes, until the bottoms of the cookies are golden brown, like this:  Golden bottom

If desired, drizzle icing over the cookies once they’re cool. Gradually mix drops of orange juice over 1 cup powdered sugar, constantly mixing; stop adding juice when icing is the consistency of yogurt. Using a pastry bag or a fork, drizzle the icing in zig-zags  over the cooled cookies, then let icing dry for at least an hour.

With their shortbread-like dough, warm cloves and tangy cranberry, these cookies impart a decadent taste and aroma alike.  They are sure to fill your kitchen with a mouthwatering zesty scent, and your mouth and belly with utter deliciousness.  And if they remind you of winter holidays, well…why not use them as an excuse to celebrate a spiced-up summer?

Maybe next time… Nuts, chopped very finely, are a great addition to this cookie dough, and melted chocolate is as scrumptious a drizzle as the icing. This recipe is a great model for endless thumbprint-style cookies, many of which I’ll share in the future. You can simply replace the cranberry sauce with almost any thick jam, replace the cloves with another  spice, or replace the orange zest with another kind. Whatever you do, enjoy!

Filled dough, pre-baked

Posted in Cookies & Bars, Sweets, Traditional with a Twist | Tagged , , , , , , , , , , , , , , , , , , , , | 20 Comments

Little Lemon Yogurt Cakes

When I got invited to an outdoor potluck wedding recently, I knew immediately what I would bring: my favorite lemon cake.  Made with yogurt in the batter, the cake is immensely moist and dense, and it’s refreshingly summery with bright, citrusy flavor. It is also extremely versatile; I’ve made it as a layer cake, full sized cupcakes, and my personal favorite: mini cupcakes.  With its thick batter and dense crumb, this recipe works especially well for the latter.  Plus, you get the usual benefits of making cupcakes in miniature form: they bake and cool quickly, a standard recipe yields over 75 servings(!) and they are–simply put–as cute as can be.  So, naturally, I decided to make my lemon cake into mini cupcakes for the wedding.  Here’s how I did it…

Lemon Yogurt Cake (makes about 80-90 mini cupcakes, about 30-35 standard cupcakes, or two 8″ round cake layers)

  • 3 cups all purpose flour
  • 2 teaspoons baking powder
  • ½ teaspoon salt
  • 1 cup unsalted butter, softened
  • 1.5 cups granulated sugar
  • 3 large eggs
  • 1 cup milk
  • 1 cup low fat lemon yogurt*
  • 1 teaspoon pure vanilla extract
  • 3/4 teaspoon pure lemon oil (if available)
  • Finely grated zest of two lemons

Preheat oven to 350°F. Whisk or sift together the flour, baking powder, and salt; set aside. Beat butter and sugar with an electric mixer on high, until pale and smooth. Turn mixer to medium and add eggs one at a time, until fully incorporated.  Turn mixer to low, and gradually add about half of the flour mixture, followed by the milk, then the other half of the flour mixture, then the yogurt.  Finally, add the vanilla, lemon zest and oil, turning off mixer as soon as they are combined. The batter will be rather thick.

If making cupcakes, line the pans with liners.  For ease and tidiness, fill a large piping bag (or plastic bag with a corner cut off) with the batter, then pipe it into the cups until 2/3 full.  Or, divide batter into two 8 inch round pans, which have been buttered and either floured or lined with parchment. Check after 10-12 minutes for mini cupcakes, 15-18 minutes for standard cupcakes, or 25-30 minutes for round cakes, adding time in small increments as needed.  Cakes are ready when toothpick tests clean, edges of top bounce back when gently pushed, and bottoms are golden brown (top surfaces will still be pale but no longer wet).  For the best texture, be careful not to over-bake. If not frosting soon after baking, let cool completely, cover, and store unrefrigerated.

Remove from pans after completely cooled, then frost as desired.  Think homemade whipped cream, a dollop of thick lemon curd, mascarpone or cream cheese icing.  [I love these cupcakes with a basic lemon cream cheese icing: 1 stick soft butter, 8 ounces soft cream cheese, 1 teaspoon vanilla, 1/4 teaspoon pure lemon oil, and 2-4 cups sifted powdered sugar (depending on how stiff and sweet you want the frosting) — all whipped together very well. Double this recipe for layer cake.For the best texture, store and serve cake at room temperature (do not refrigerate), and eat within 48 hours. Of course, the frosting needs to stay chilled, so just be sure the frosted cakes don’t sit out un-chilled for too long. (You may want to ice the room temperature cupcakes just before serving).

Maybe next time…  For the wedding, I decorated my mini cupcakes with a simple blueberry centered on the top of each.  They are equally pretty with almost any berry, and lemon drop candies or edible flowers would also make beautiful adornments.  As my talented friend Katy suggests, a sprinkle of dried lavender flowers would be a welcome addition to this cake’s batter.  I’ve also filled the cake with homemade lemon curd (featured in my slideshow), layered it with strawberry compote, and filled it with berries and custard.  You might also try lime or orange additions for an array of citrus flavors, or add vanilla bean seeds to the icing or batter for extra warmth. Whatever you do, enjoy wholeheartedly with a spirit of celebration and refreshment!

*Often available in convenient 8-ounce containers (try Trader Joe’s), lemon yogurt really yields the best flavor.  (I sort of hate to admit this, since I am usually leery of pre-flavored ingredients, but I’ve tried plain yogurt in this cake, and it just doesn’t compare.) If you use vanilla or plain yogurt instead of lemon, add the zest of two more lemons and a second teaspoon of lemon oil to the batter.

Posted in Cakes & Cupcakes, Sweets, Traditional with a Twist | Tagged , , , , , , , , , , , , , , , | 8 Comments

Tea and Sympathy: The Cake

Before I heard that Tea and Sympathy was a play, a restaurant or a song, I only knew it as a soothing cocktail: hot tea with a splash of Grand Marnier.  A warm mug of tea is my go-to drink for relaxation and comfort, and I’ve always loved the idea that sympathy can be added to it with a splash of orange liqueur.

When I recently discovered a remarkably delicious Earl Grey tea – fragrant with vibrant bergamot and speckled with beautiful, tiny flower petals – I found myself drinking it daily and, naturally, I couldn’t help but think of turning it into a dessert.  It wasn’t long before I decided to pair it with orange liqueur and create my very own version of Tea and Sympathy: the cake.  Despite its length, this recipe is actually quite easy – but if you are short on time, don’t miss the simplified version at the very end of this post.

Tea & Sympathy: The Cake (Serves 8-10)

For the cake:

  • 1 cup flour
  • 1.5 teaspoon baking powder
  • ¼ teaspoon salt
  • ¼ cup oil
  • ¼ cup honey, at room temperature or a little warmer
  • Scant ¼ cup sugar
  • 1 large egg
  • Finely grated zest of 1 orange
  • ½ cup strongly brewed good quality black tea (see preparation)
  • 2 teaspoons crushed good quality dried black tea leaves (see preparation)

Preparation:  Line the bottom of an 8” round baking pan with parchment, or grease and lightly flour pan. Brew the tea far enough ahead of time to let it cool to at least warm room temperature. Be sure to brew it with more than ½ cup water, as you will lose some liquid due to soaking into the tea leaves/bag (brew, then cool, then measure out ½ cup). Use a mortar and pestle or spice grinder to finely crush the dry tea leaves. Be sure to use more than 2 teaspoons of tea leaves, as they will shrink as you crush and sift them (crush, then sift, then measure out 2 teaspoons).  Zest the orange; set aside.  Preheat oven to 350 F.

Make the batter:  Beat the oil, honey, sugar, brewed tea, and egg together until smooth.  Sift or sieve over the honey mixture: flour, baking powder, and salt. Mix until smooth and even. Add the orange zest and the crushed, pre-sifted tea leaves, stirring until evenly distributed.  The batter will be thin and will seem shallow when poured into the pan; this is intentional, as the custard will make it very rich.  Bake about 25 minutes, until the edges have browned, reveal bubbles, and center bounces back when pushed gently.  Let cool in pan 20 minutes before removing.

For the custard, a.k.a. “sympathy sauce” (this can be done while cake is cooling):

  • 3 egg yolks
  • 2 tablespoons sugar
  • 2 tablespoons Grand Marnier*
  • 1 cup heavy whipping cream
  • ½ teaspoon pure vanilla extract
  • 1 tablespoon sugar

Whisk together the first three ingredients in a heat proof  bowl.  Set bowl over a pot of simmering water and whisk constantly, cooking for about 6 minutes, until mixture has thickened enough to coat the whisk, and a trail stays in the mixture when whisk is dragged through it. Set bowl on counter and keep whisking about 5 more minutes, until bowl is no longer hot but just warm to the touch.  Cover and chill.  Meanwhile, beat together the remaining three ingredients until stiff. Just when custard is at room temperature (after about 5 minutes in the fridge) fold it into the whipped cream gently.

When the cake has cooled, slice it into 8-10 pieces, or use a cookie cutter to cut circles from it (I used a 2.25” cookie cutter and was able to make 8-9 circles).  Top each serving of cake with a few generous spoonfuls of the custard.  In other words, be liberal with your sympathy.

Moist, rich and fragrant, this cake is equally wonderful as a breakfast, a snack, or a dessert. You might serve it in decorative teacups for dainty presentation, or try topping each piece with a fresh berry or a candied violet flower.  Whatever you do, don’t be ashamed to mindfully devour every bite – after all, everyone deserves a little sympathy sometimes.

Maybe next time… *If you like a boozier dessert, use a pastry brush to paint a little more Grand Marnier on the cake before topping it with the custard.  Or, to make a much quicker, simpler, milder version of this cake, omit both the crushed tea leaves and the orange zest, and instead of making a custard sauce, just brush the baked cake with a few tablespoons of Grand Marnier, then dust with powdered sugar — the flavors will be tamer but still delicious.  Enjoy your cake with a cup of tea… or a glass of liqueur for that matter!

Posted in Baking with Tea & Coffee, Cakes & Cupcakes, Sweets | Tagged , , , , , , , , , , , , , , , , , , , , , , , | 19 Comments

Beyond Breakfast: Granola, the Cookie

Some see granola as a cereal to be topped with milk. For others, it’s a yogurt topping or an accompaniment for fruit. There are purists who simply eat it like popcorn. And then there are those of us plagued with baking madness, who see granola as an ingredient for a dessert.  Here is my favorite way to reincarnate it…

Granola Cookies (makes about 36 cookies)

  • 1/4 cup butter, at room temperature*
  • 1/3 cup packed brown sugar, preferably dark
  • 1/2 cup chunky peanut butter*
  • 1 egg
  • 1/3 cup flour*
  • 1/4 teaspoon baking powder
  • 1/2 teaspoon ground cinnamon, rounded
  • 1/4 teaspoon salt, rounded
  • 1 & 2/3 cup granola
  • 1/3 cup packed raisins

Line cookie sheets with parchment paper or grease them. Preheat oven to 350 F. Beat the butter and sugar until smooth and fluffy. Beat in the peanut butter, then the egg.  Sieve or sift the flour, baking powder, salt and cinnamon over the sugar mixture, then mix until evenly incorporated. Fold in the granola and raisins until evenly dispersed.

Drop dough by the scant tablespoon onto the prepared cookie sheets at least an inch apart from one another. Press the centers of the cookie dough dollops down using the back of a spoon on your thumb (it helps to dip it in water first).  Bake for 9-10 minutes.

The bottoms of the cookies will seem quite brown, but this crisp edge pairs well with the other textures. Remove and let cool on sheets for a few minutes before transferring cookies to a plate, cooling rack, or mouth. If you like a slightly sweeter, spicier cookie, dust the tops of the cooled cookies with a mixture of powdered sugar and ground cinnamon.  Store at room temperature in an airtight container for up to 3 days.

At once crispy and soft, chewy and crunchy, these cookies are sure to satisfy all varieties of granola lovers.  And despite the title of this blog post, these hearty cookies are great for breakfast or any time of day.  For a rich dessert, serve a few with vanilla ice cream and a dash of cinnamon.  Disclaimer: It can be be difficult to see plain granola as anything but a cookie ingredient after trying these cookies. (But then again, that’s coming from me, the one who thinks of fresh baked biscotti whenever she gets a whiff of fresh lavender flowers!)

*Maybe next time… To make these dairy-free and add a welcome hint of coconut, use coconut oil in place of butter. If you use smooth peanut butter, add scant ¼ cup chopped nuts to the dough; alternatively, almond or another nut butter would be equally good. As for flour, all-purpose, whole wheat, or a gluten free mix will all work fine. If you choose a granola that contains dried fruit, you might try swapping the raisins for one that pairs well with yours (dried blueberries, apricots, cranberries… the possibilities are nearly endless!).


Posted in Cookies & Bars, Sweets, Traditional with a Twist | Tagged , , , , , , , , | 13 Comments