Bitters and Pear Sorbet

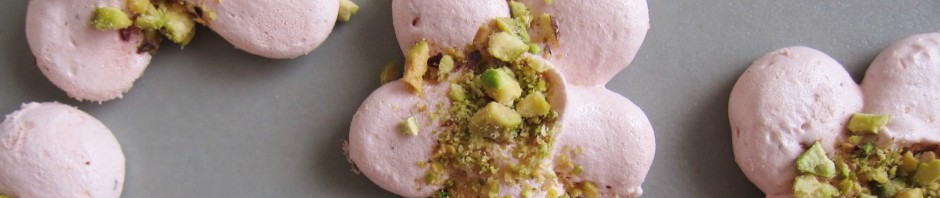
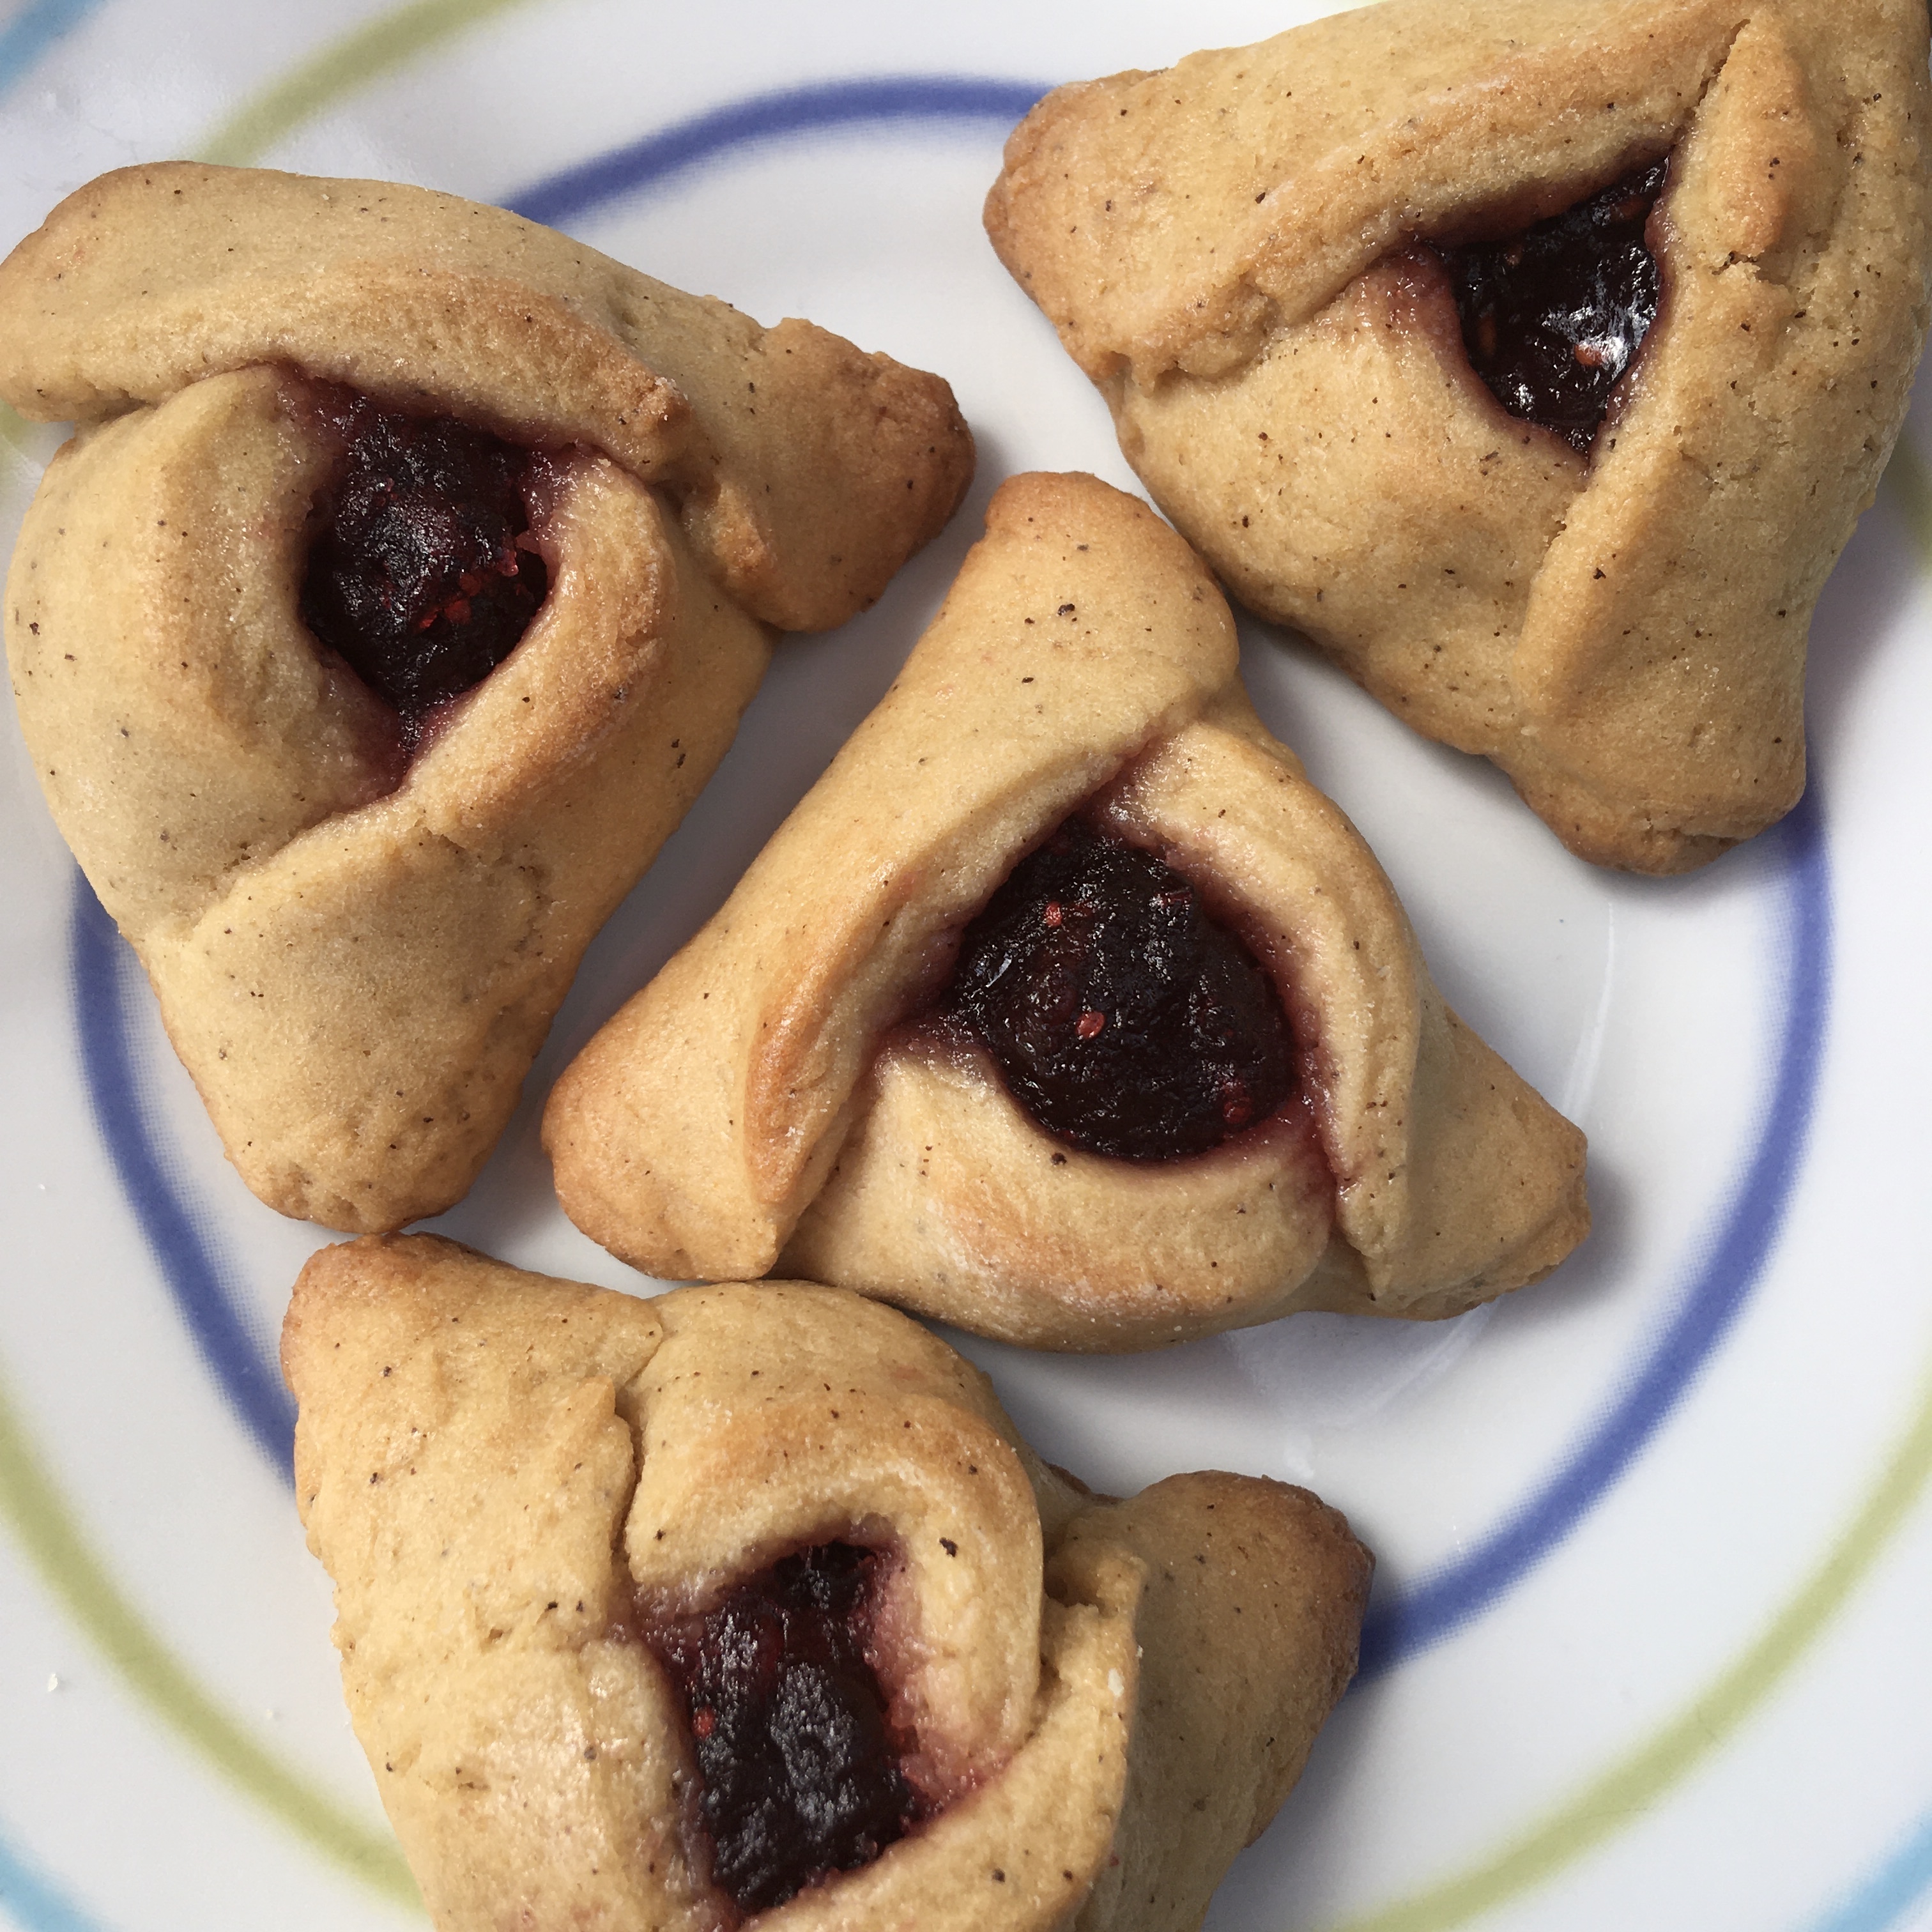
It’s no secret that a splash of aromatic bitters adds a welcome flavor element to both seltzer and cocktails: earthy, botanical, tart. And its history as a soothing medicinal tonic is positively fascinating (more about that here). But for me, I know bitters best as a elevating ingredient in desserts, having readily sprinkled it into cookie recipes and oven-bound fruit pies. Most recently, I daydreamed of flaunting bitters in a refreshing fall sorbet, just in time for pear season. 

Since pear and spice are a favorite match of mine, it made sense to reach for a brand of bitters that offers pleasant hints of clove alongside the classic bitterness akin to grapefruit peel — not to mention an almost candylike aroma. With a balance of warm vanilla and tangy lemon, the sorbet’s simple ingredients were sure to result in a scrumptious scoop. And really, a light and bright sorbet is a welcome dessert any time of year if you ask me.

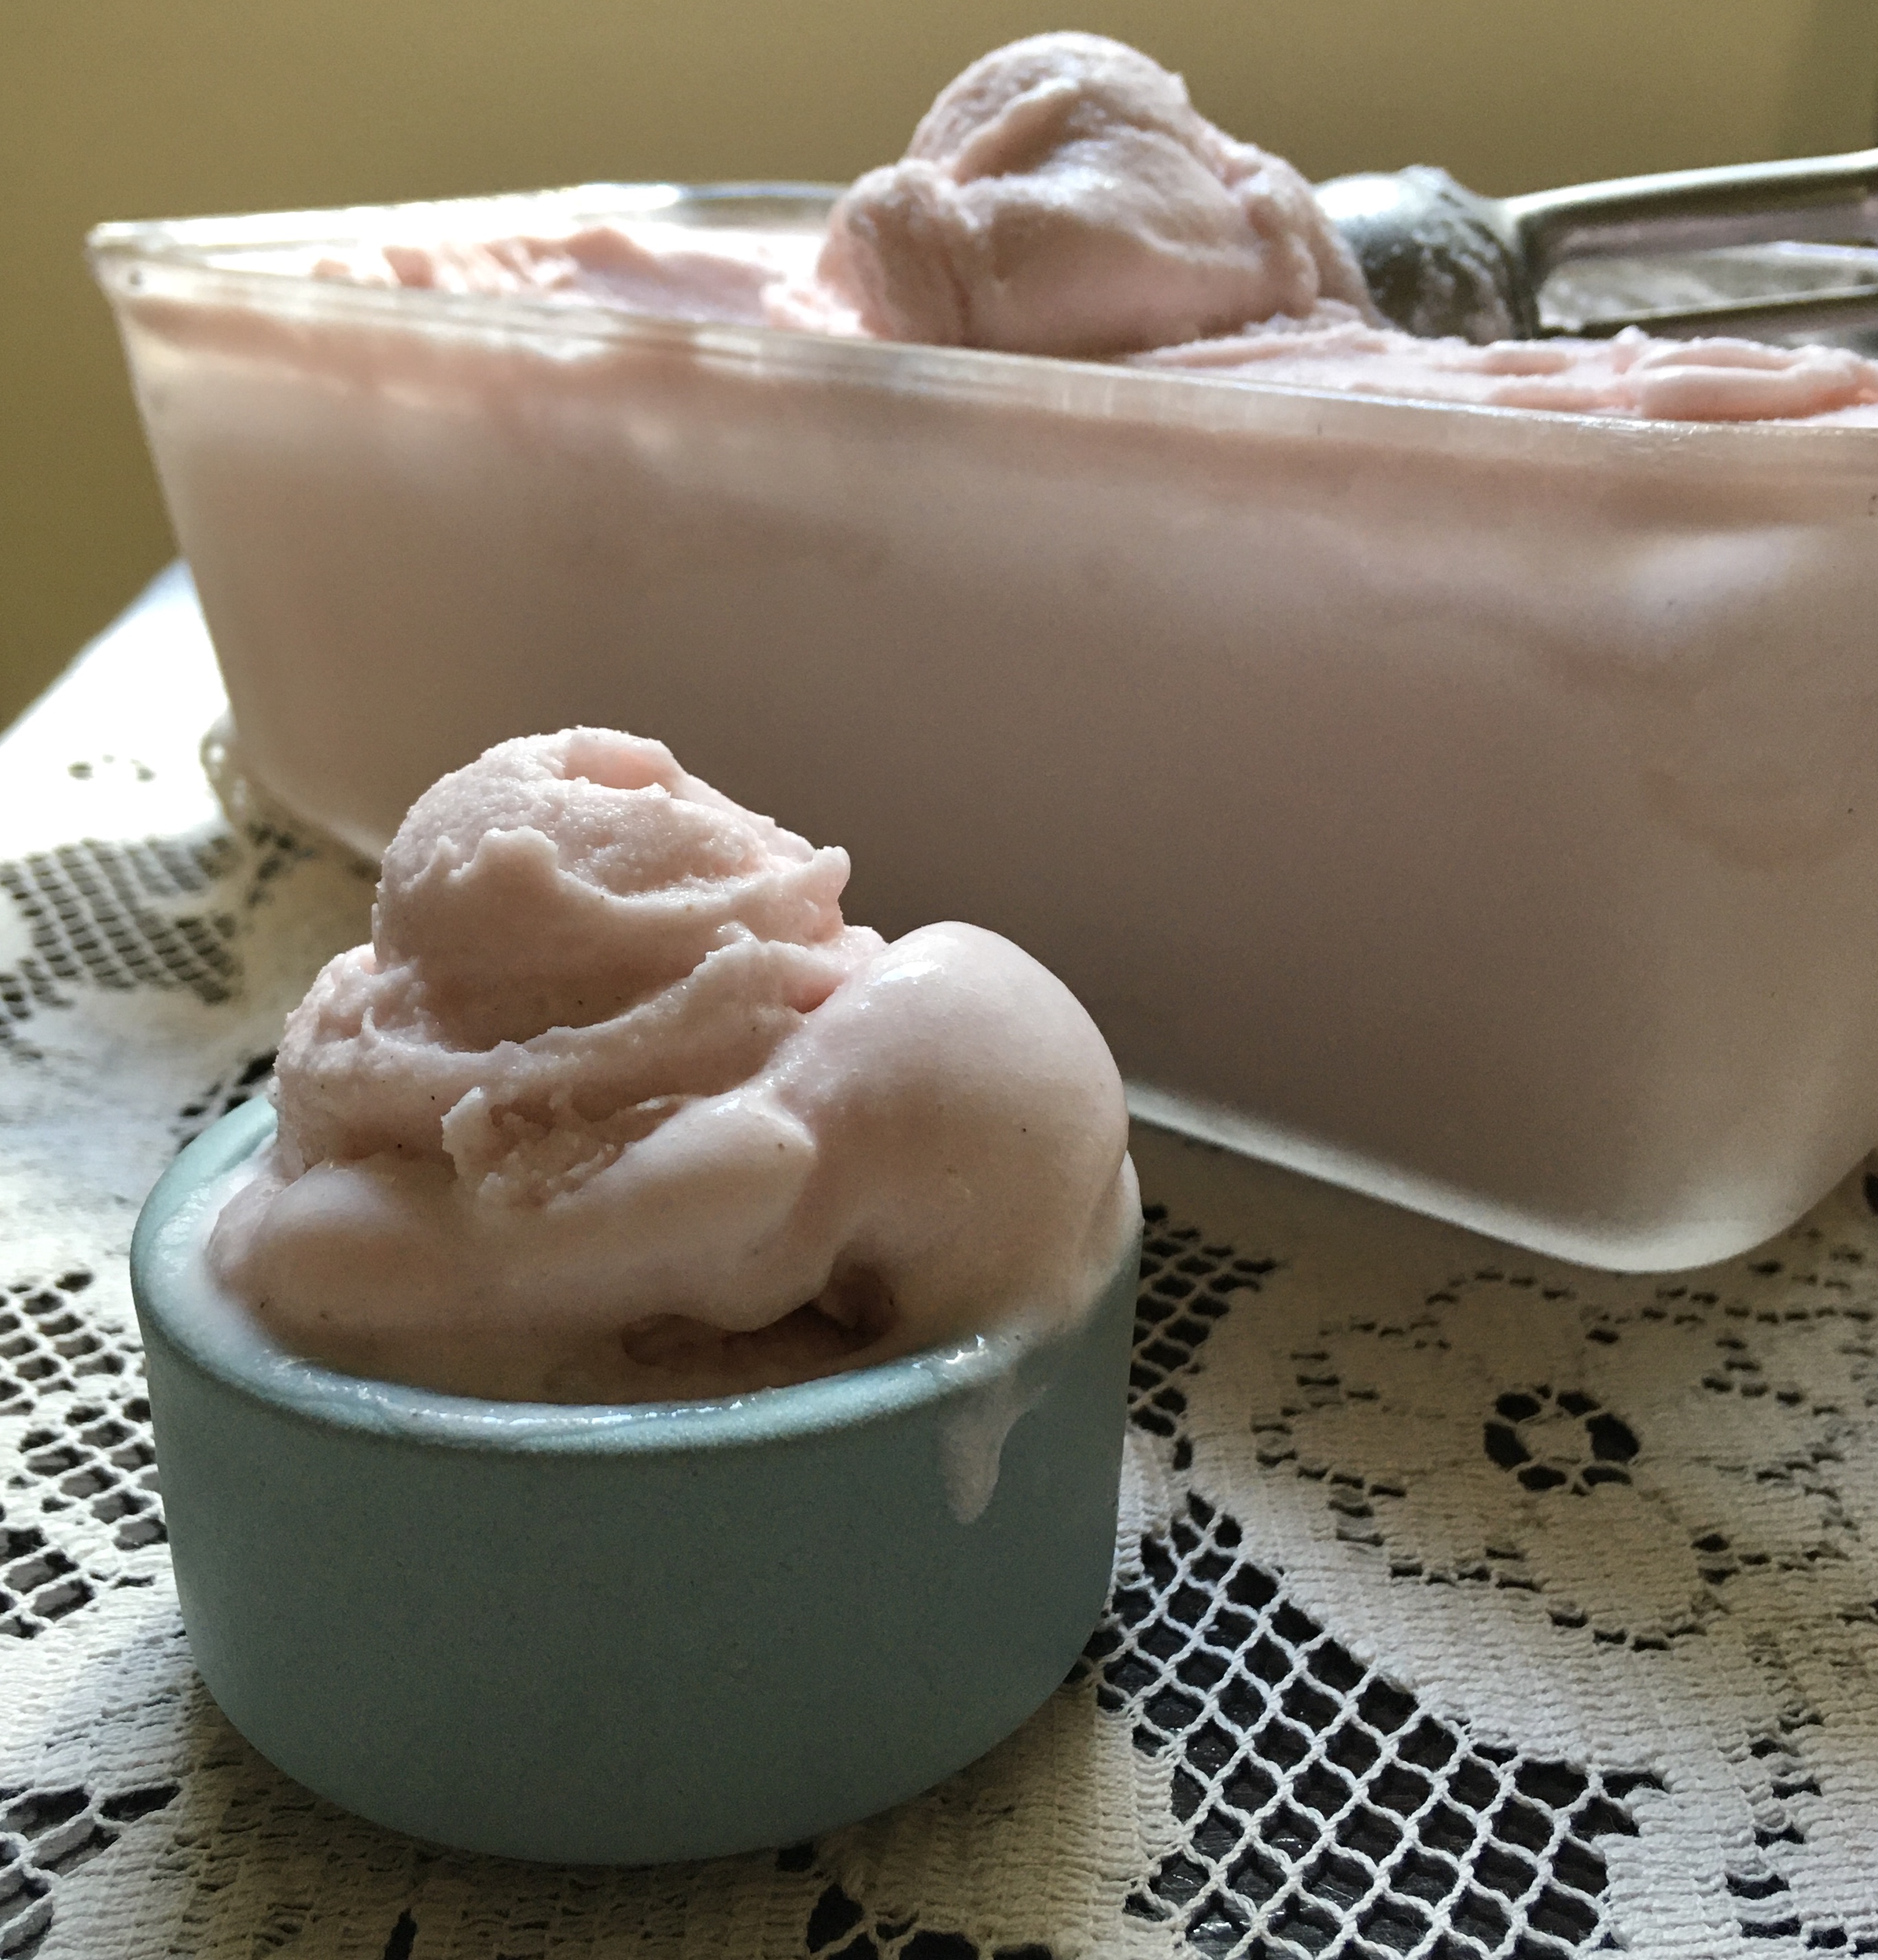
While my first batches featured a paler bitters essence and the use of an ice cream maker, I eventually landed on a more robustly aromatic syrup and a simpler no-churn process — and the result is super satisfying. I had also started off without peeling the pears (the way I did here), but found that their skins led to a less than pleasant mouthfeel and flavor. Peeling the pears is worth every bit of countertop labor, I promise.

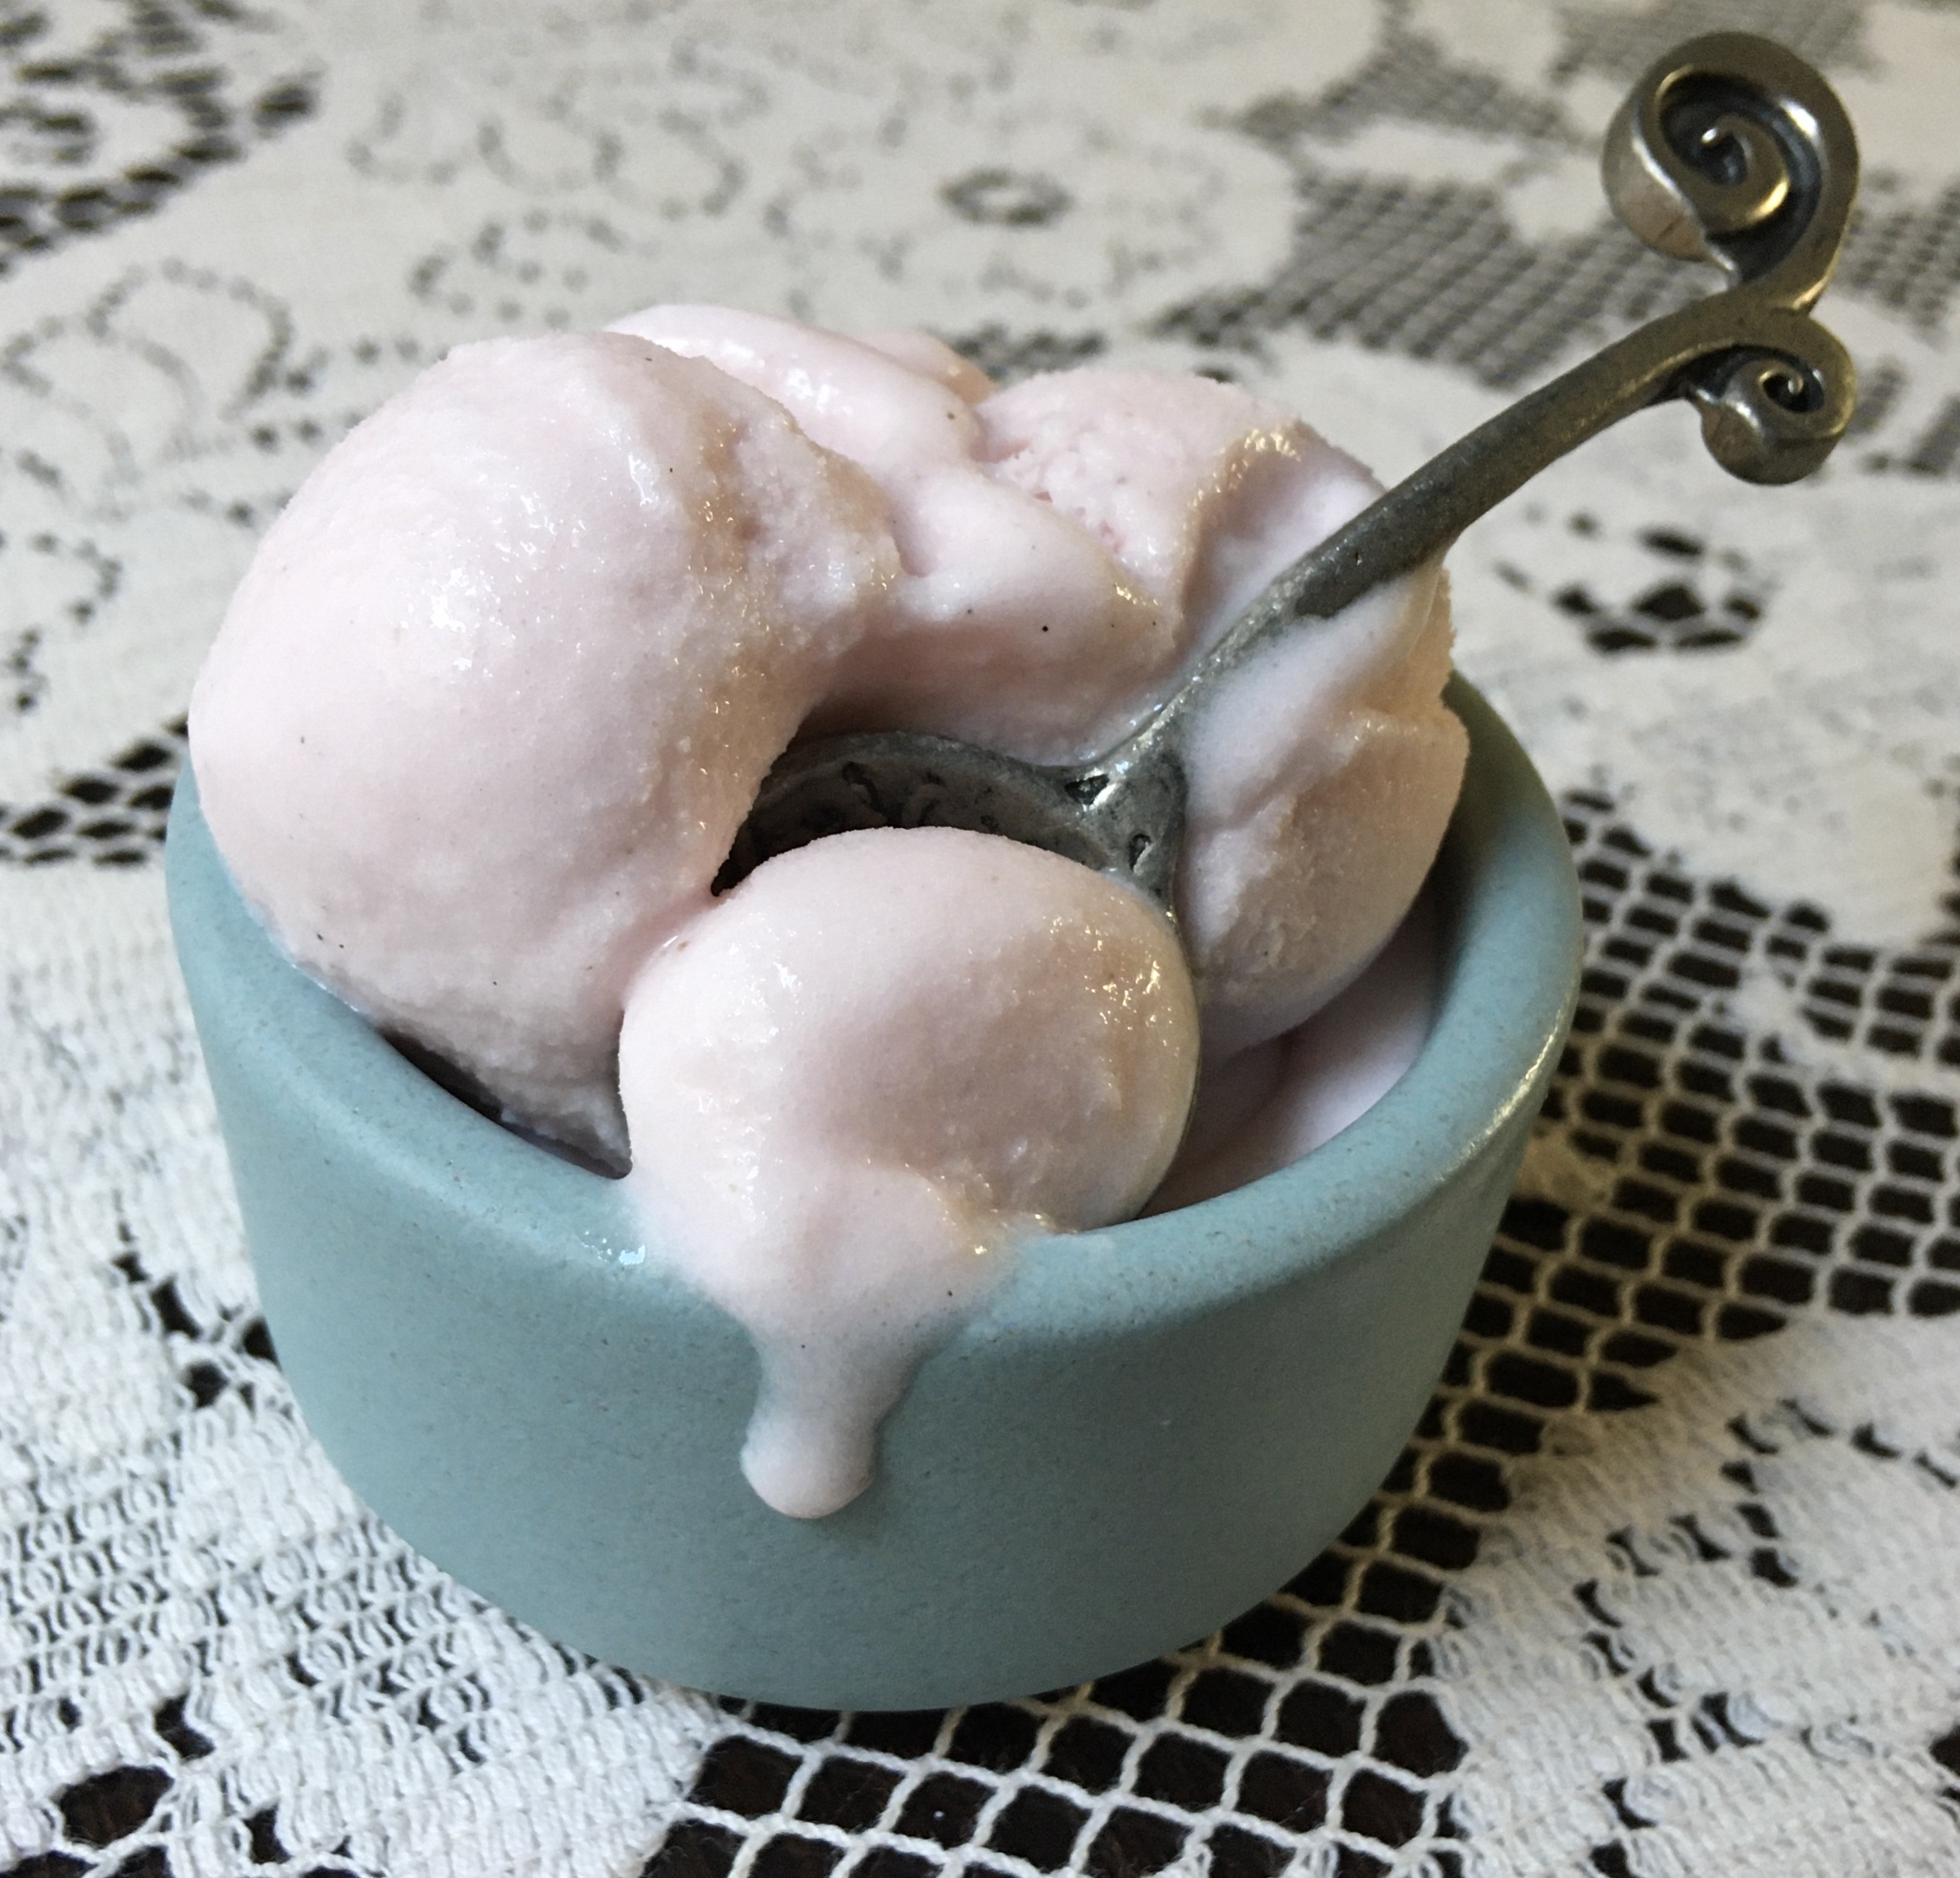
Blended when frozen, the ripe, peeled pears create a mild but full-bodied texture: a silky-smooth canvas to showcase the spirits within. With whispers of earthy spice, the sweet fruit balances perfectly with the delicate tang of bitters, and every spoonful is refreshing. The only special equipment you need is a sturdy food processor and some perseverance while using it. 

Bitters & Pear Sorbet

Makes about a quart

  • 1/3 cup aromatic bitters, preferably Peychaud’s*
  • 1/3 cup granulated sugar
  • 1 tablespoon pure vanilla extract
  • 1/4 teaspoon salt
  • 3 to 3.5 pounds ripe pears (about 8 medium pears); I used Bartlett*
  • 1 tablespoon fresh squeezed lemon juice
  • food processor with a capacity of 7+ cups

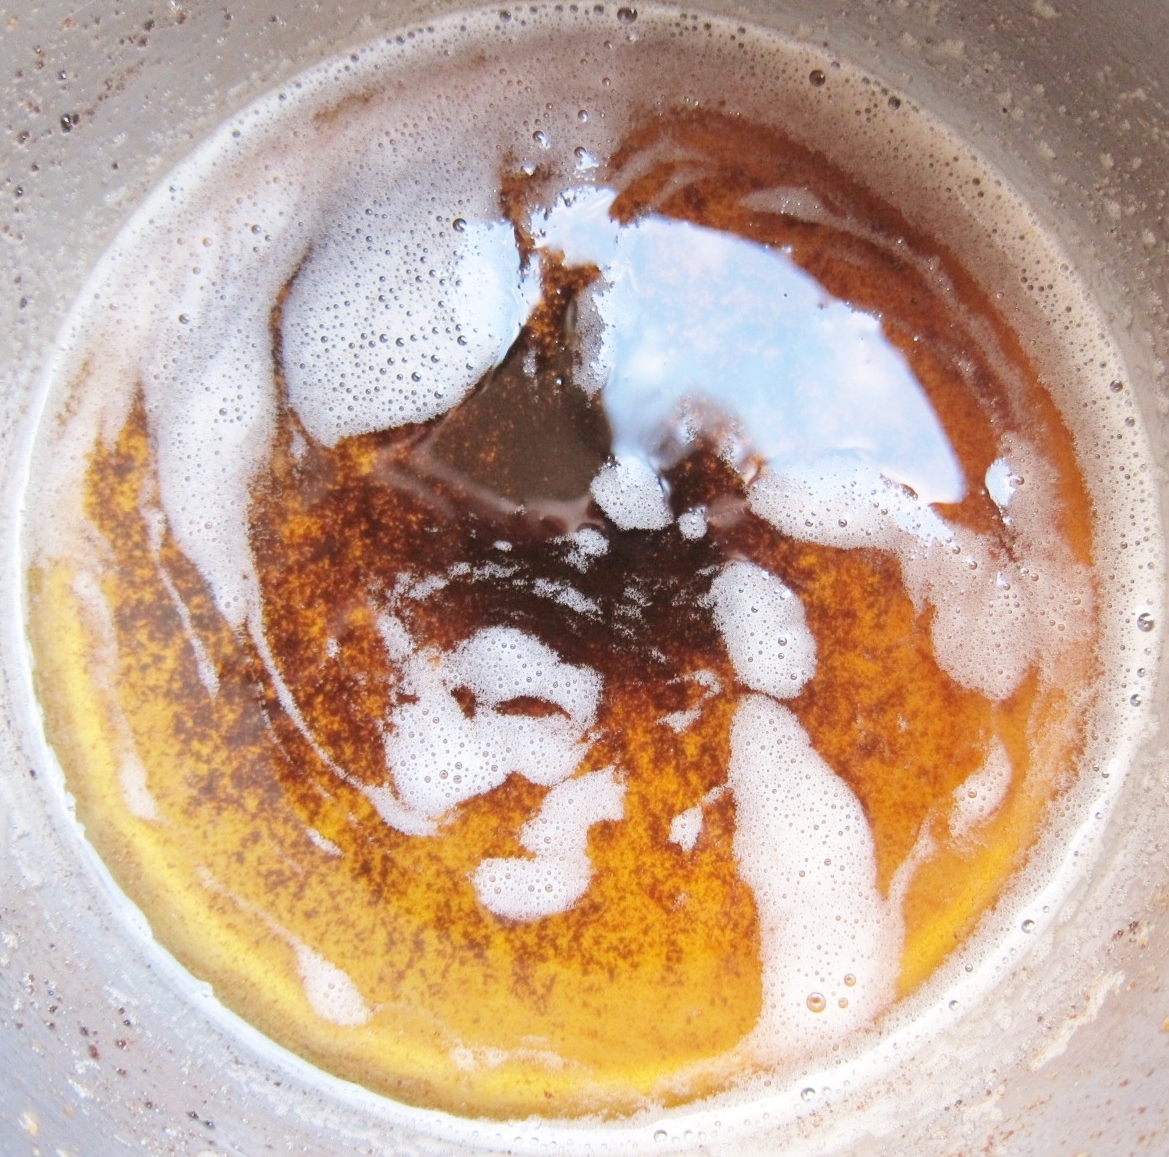
In a small saucepan, combine the first four ingredients. Whisk over medium heat until sugar dissolves, then let syrup bubble for about 15 seconds (not much longer, as it will thicken more than desired). Remove from heat. Let cool to room temperature, then refrigerate to thoroughly chill.  If you wish, you can pause at this point, cover syrup tightly in fridge, and carry on with recipe up to 5 days later.

Remove stems from pears, then peel. Since the pears can be soft, I tend to quarter the pears and then carefully use a paring knife to remove the peel, rather than using a peeler. Remove any soft brown spots. It’s OK if a few little bits of peel remain. Remove and discard the pears’ cores and spines, then cut pears into half inch cubes. You want about 2.25 pounds of cubed pears.

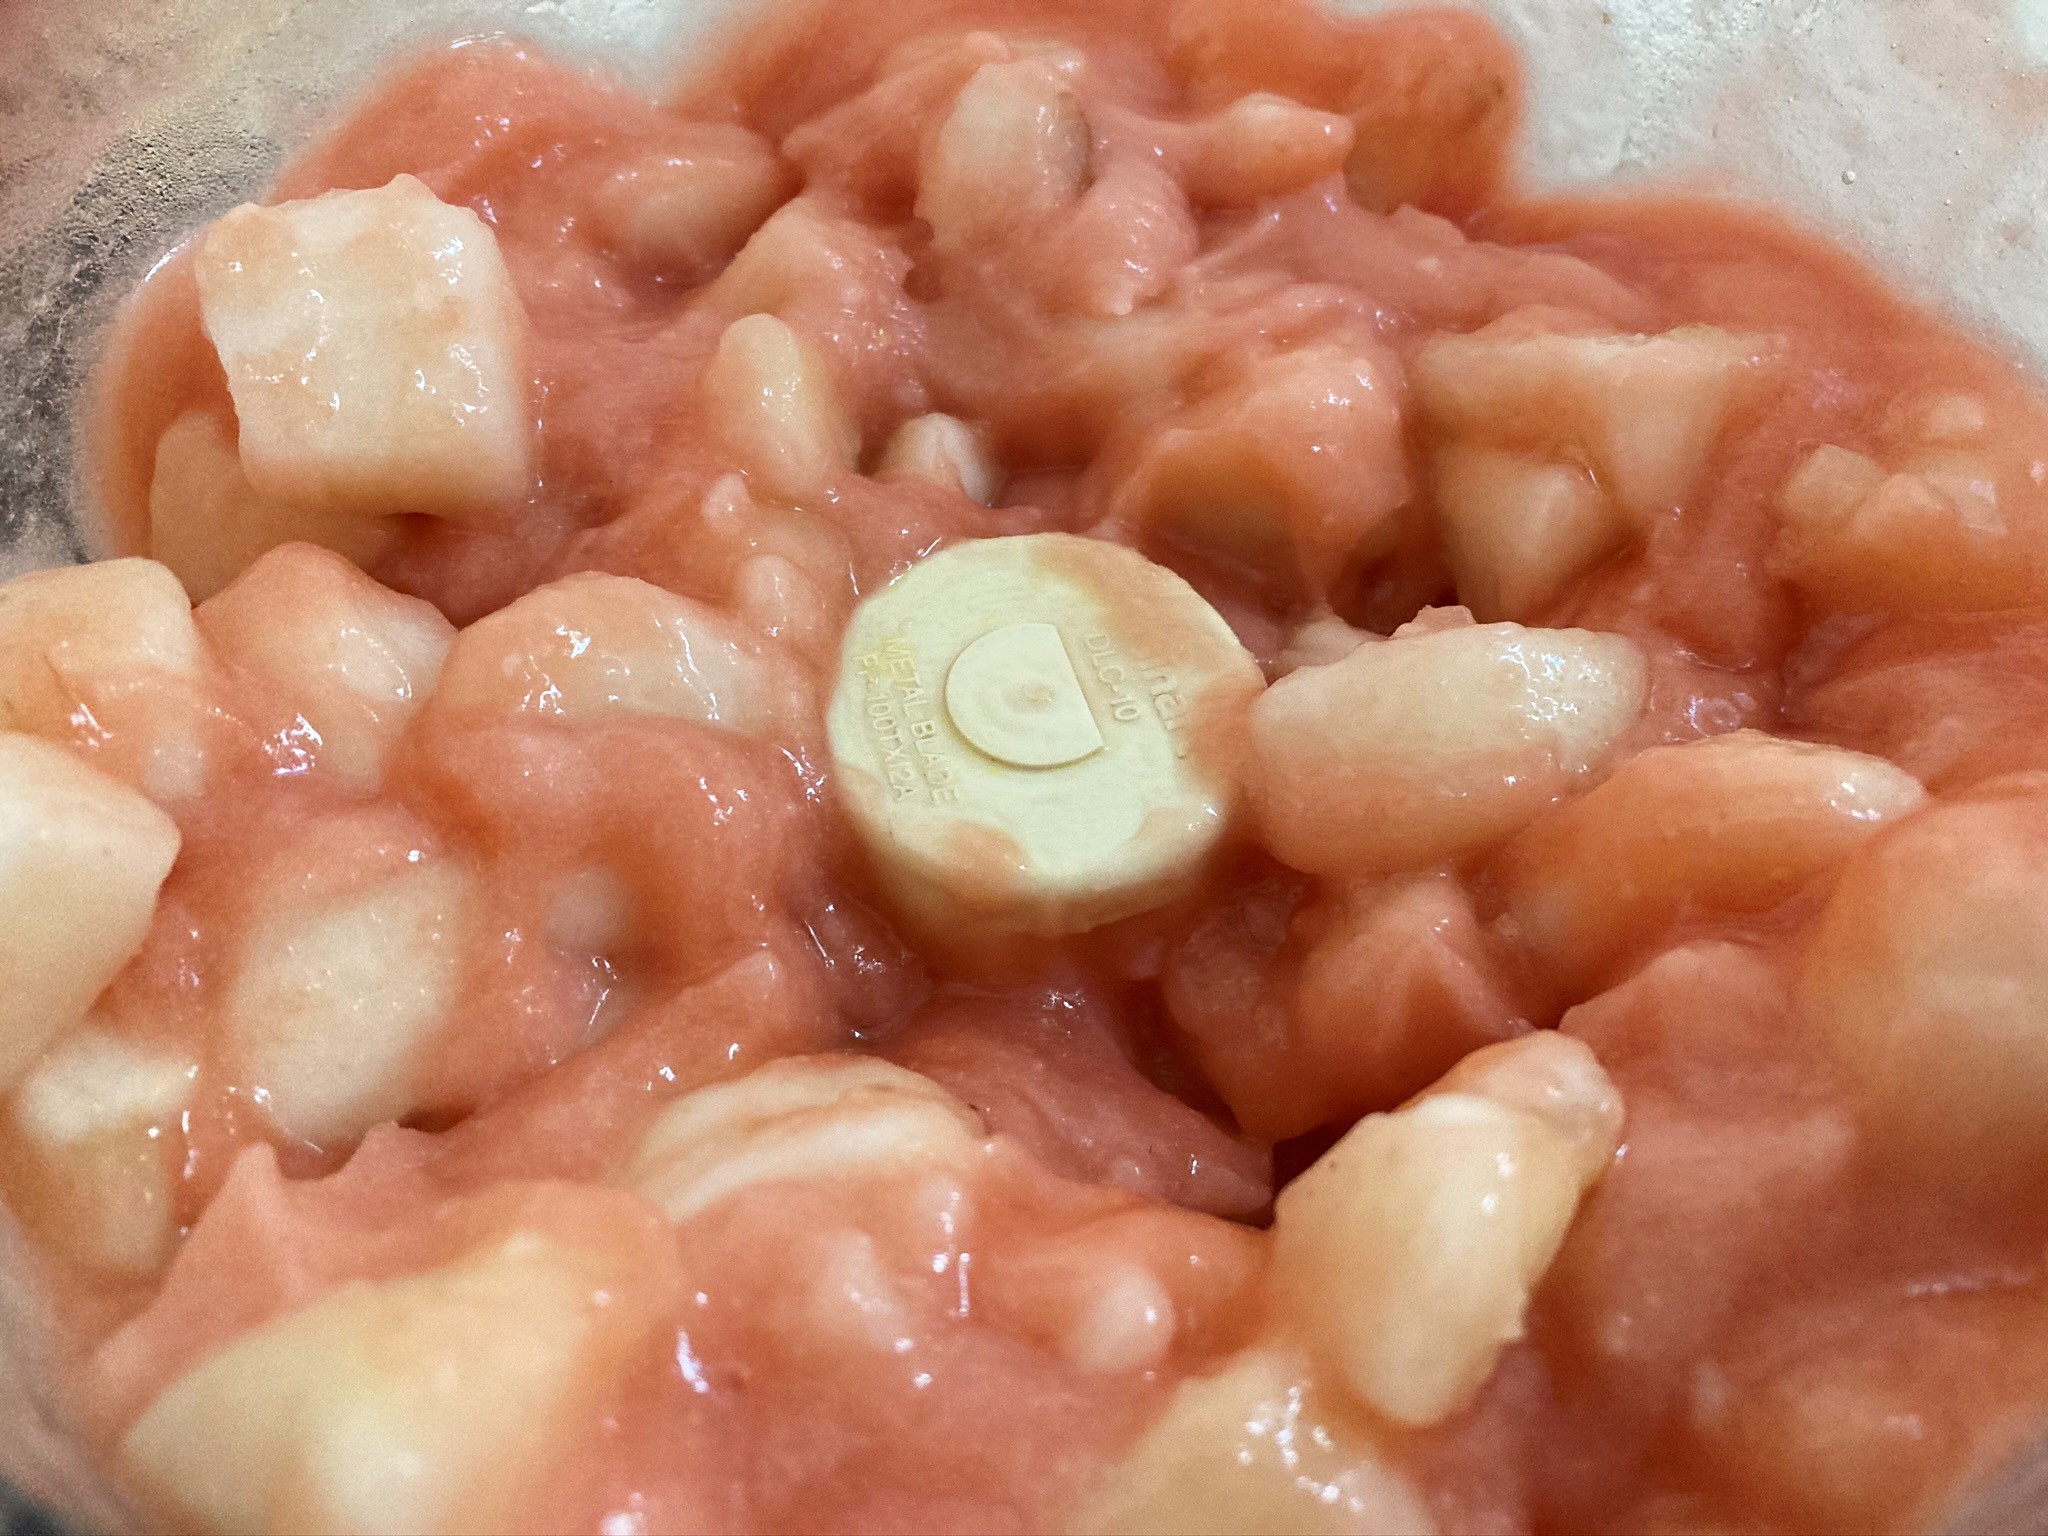
The first stage of blending frozen pear pieces with the chilled syrup.

Toss pear cubes with the lemon juice. On a parchment lined baking sheet or large platter, spread out the lemony pears so they are minimally touching, and place in freezer until frozen through (usually a minimum of 30 – 45 minutes, depending on your freezer’s temperature). Once pears are frozen, cover tightly if not using right away. You may transfer them to a ziploc bag or lidded container, keeping them in the freezer for up to two days. (Don’t try to initially freeze them piled onto one another; you’ll end up with a giant ice block.)

Halfway there: You want most of those pear pieces to disappear, so keep blending at this stage.

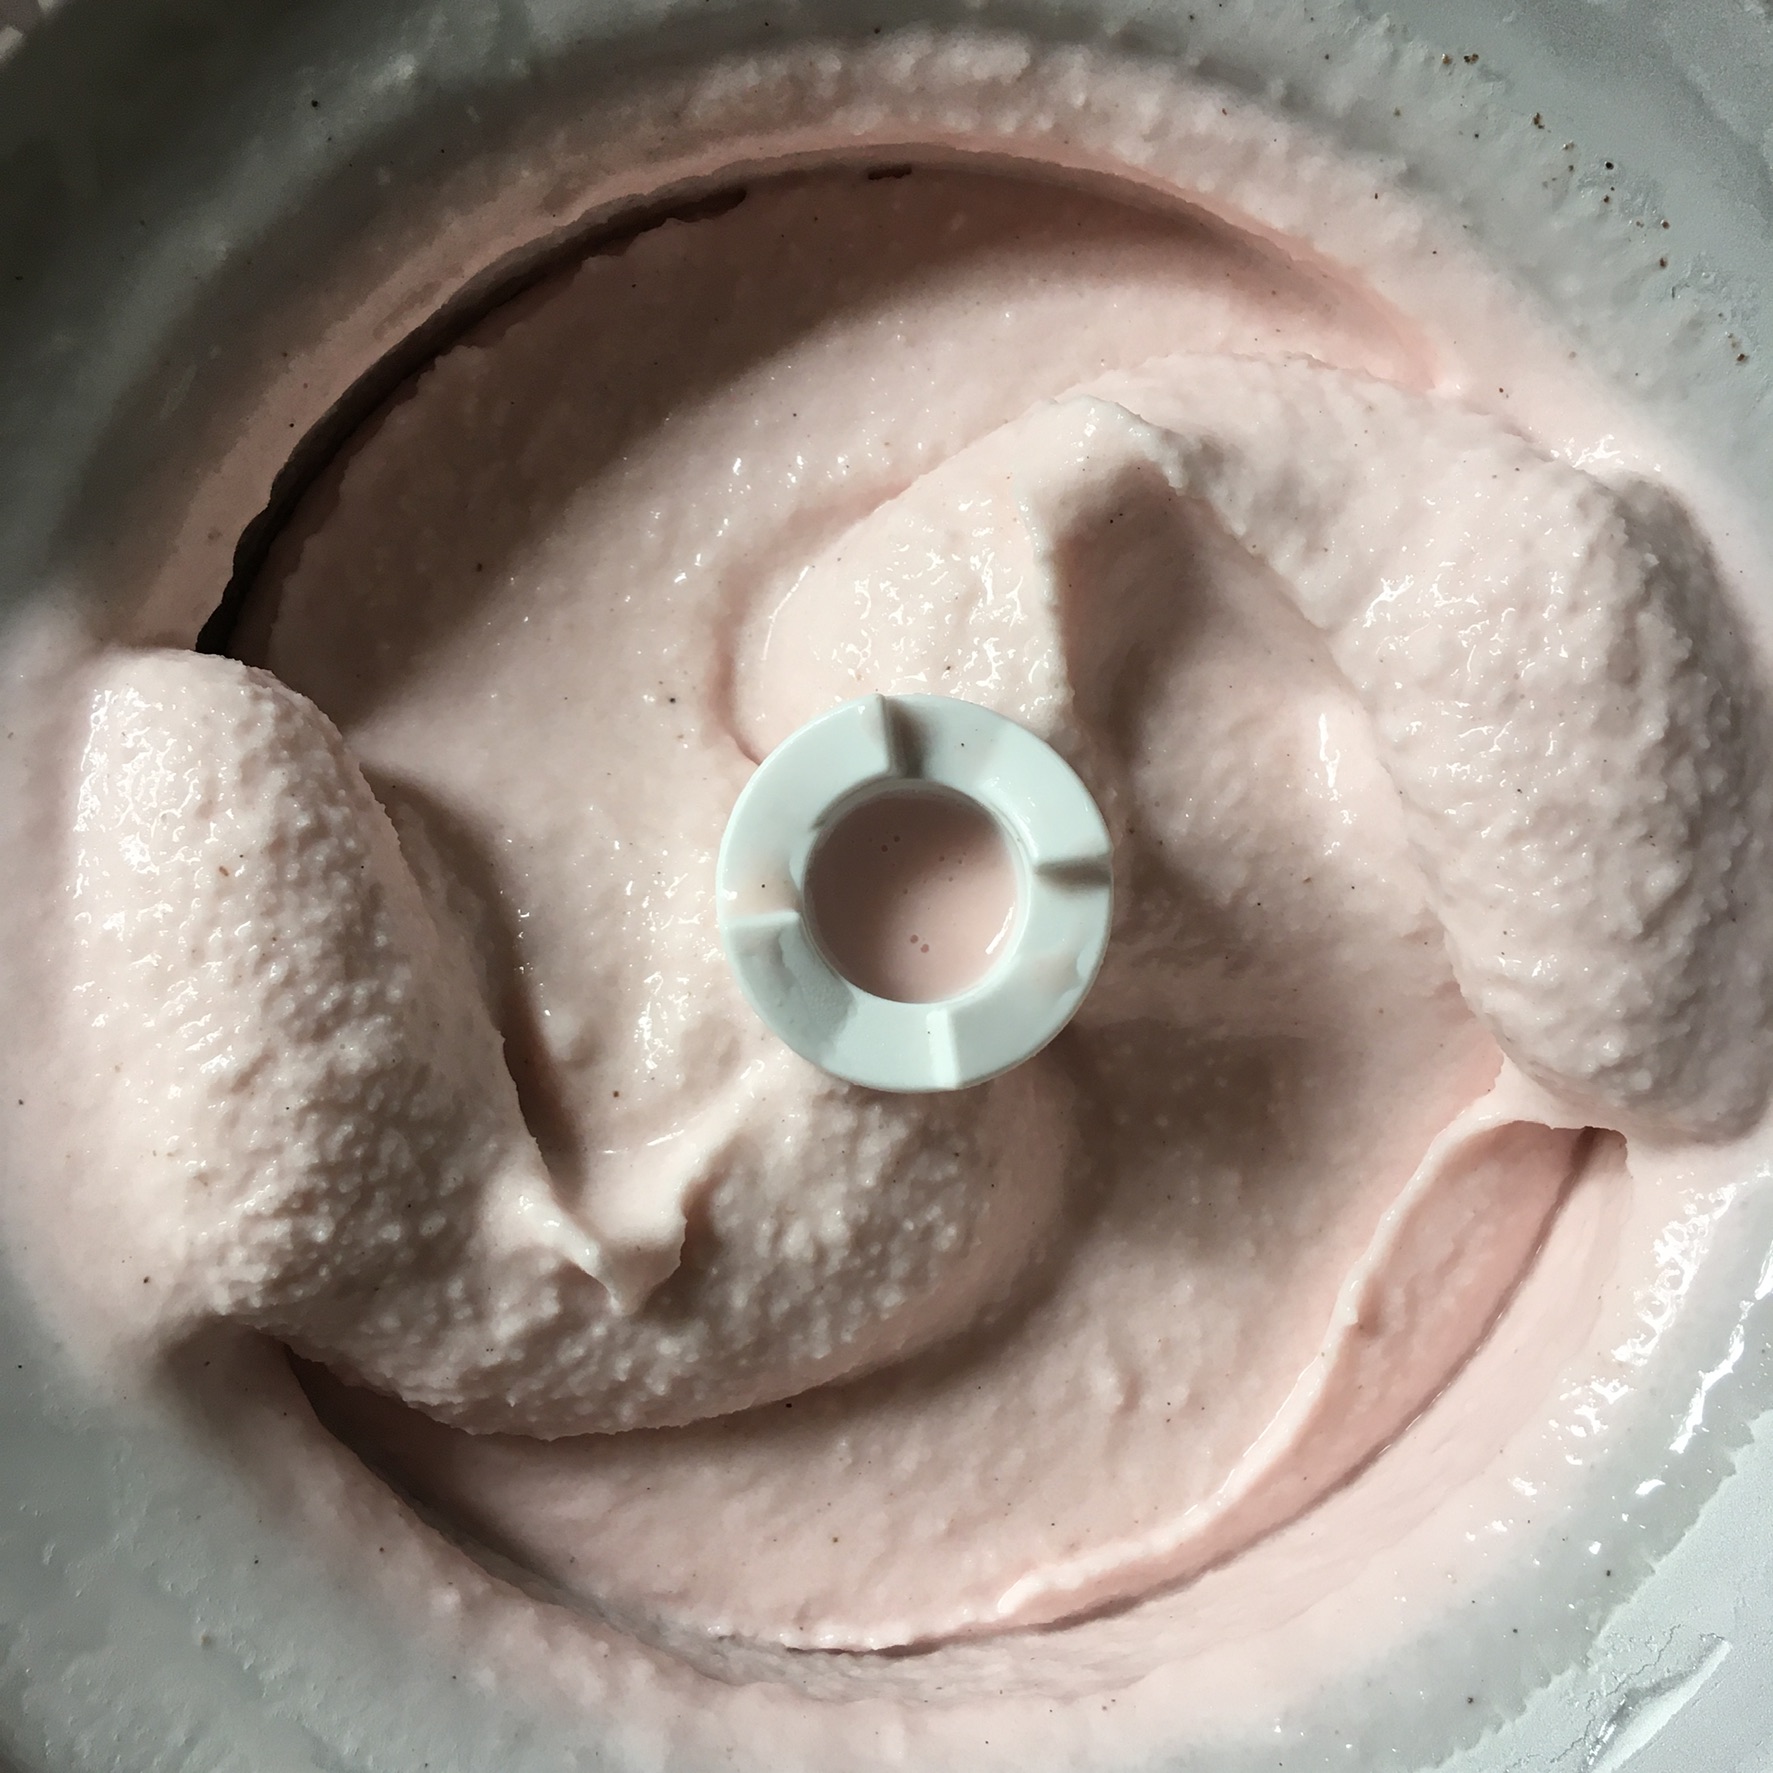
When ready to make the sorbet, place about half the frozen pear cubes in the bowl of the food processor, along with about half of the chilled syrup. Pulse and blend, adding more syrup if needed. Add the remainder of the pears and syrup in stages, blending in between. Stop regularly to turn off food processor and remove lid, scraping down the sides of bowl and pushing pears down gently as needed. Continue blending and pulsing until a smooth sorbet has formed. (This can require some patience and noise tolerance.)

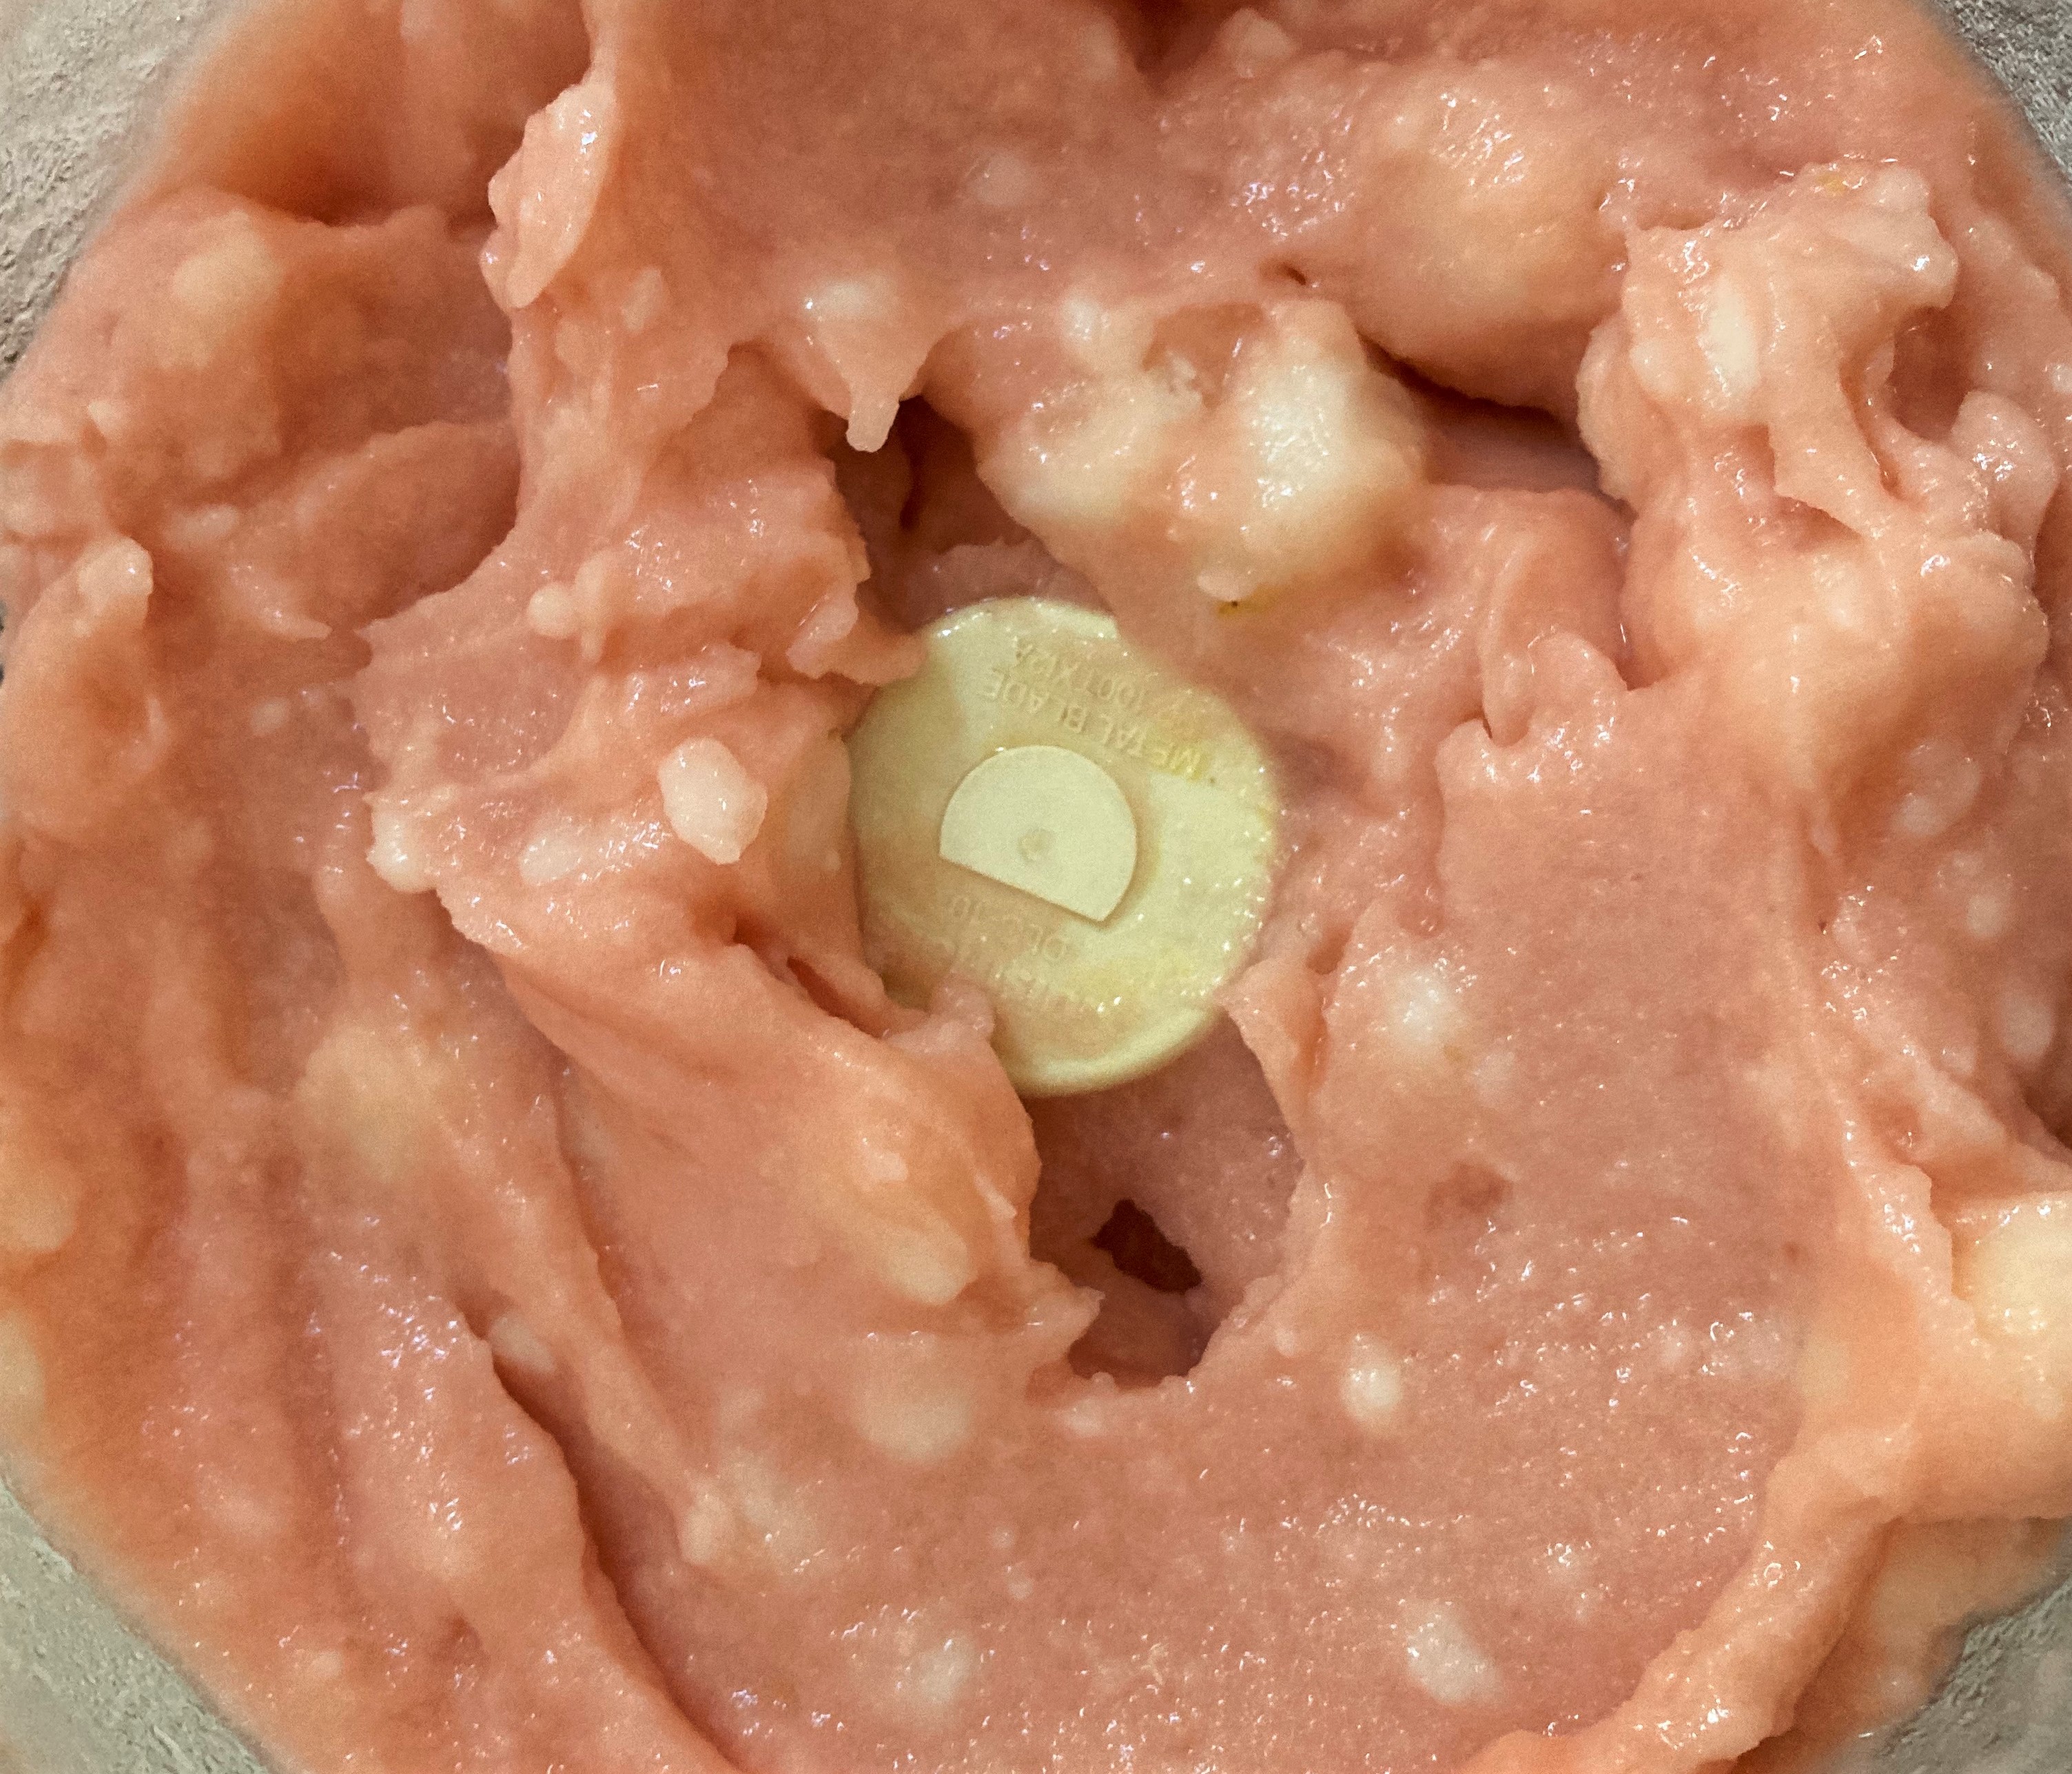
Done! Sorbet is fully blended when it spreads smoothly, and only a few tiny pear pieces are present.

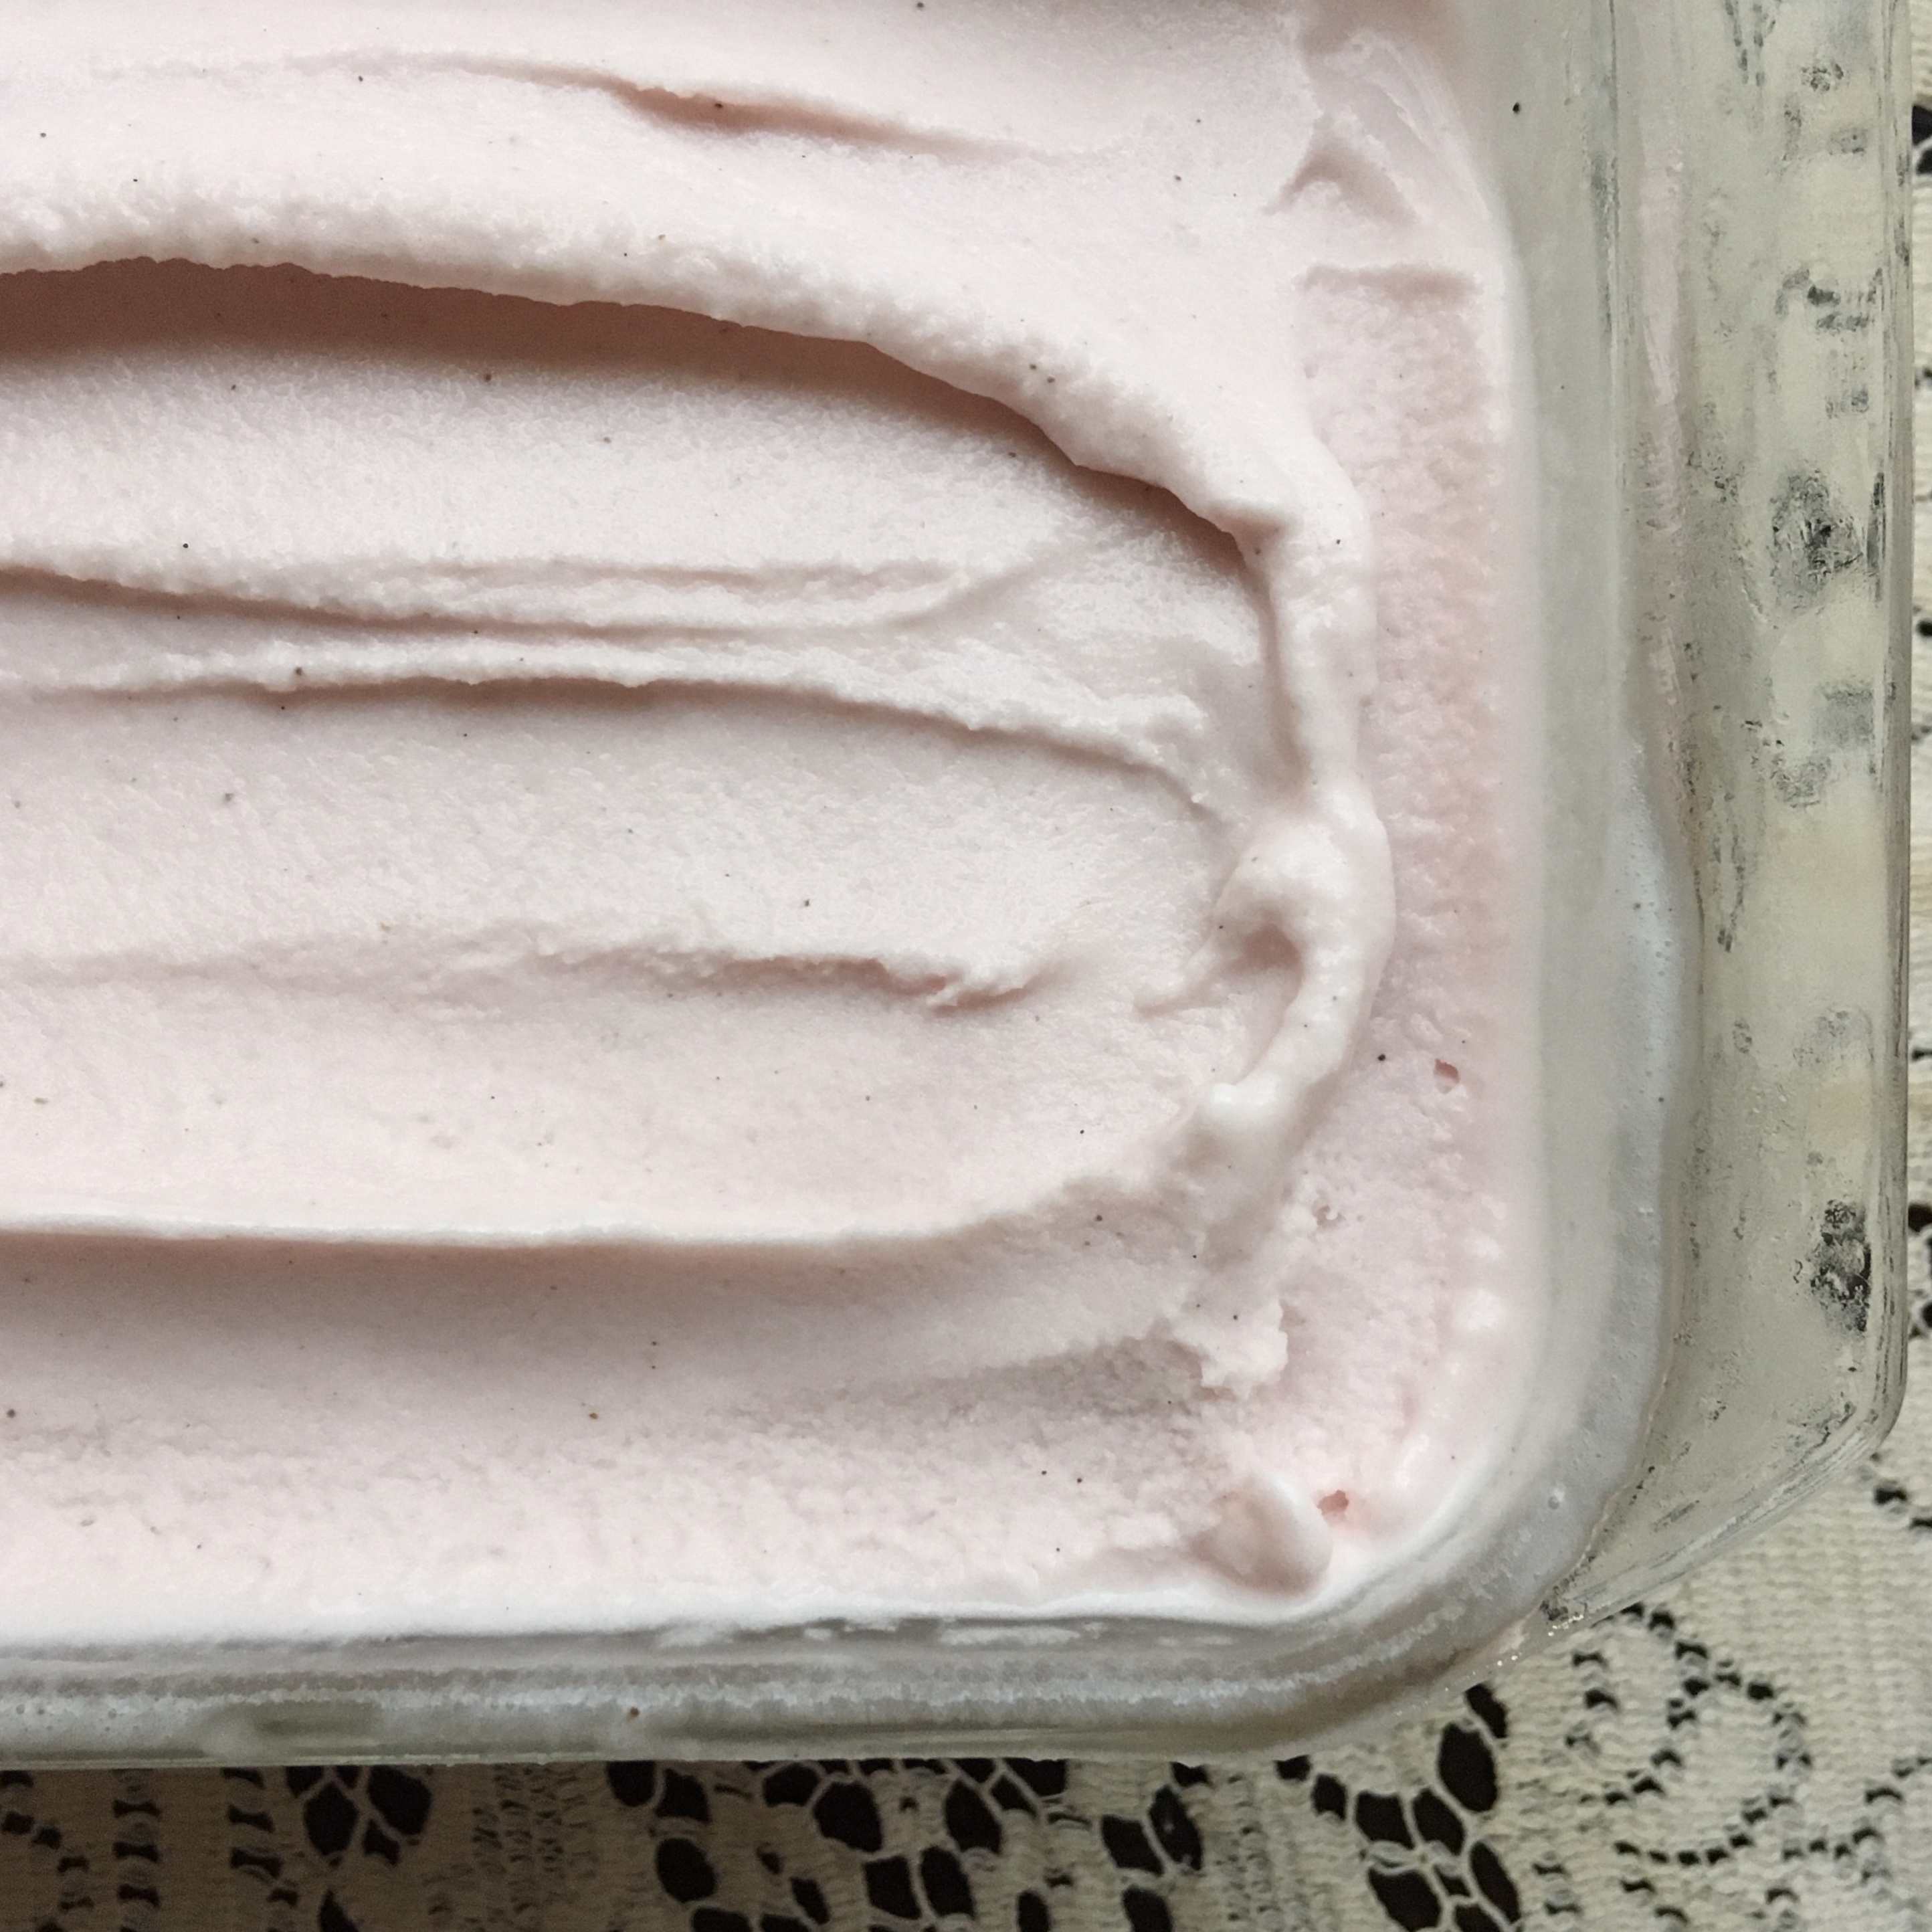
Sorbet can be eaten right away at this softer texture, or frozen in a sealed container for a firmer, more scoopable texture. Store tightly covered in the freezer, eating within a week. If deeply frozen, you may need to sit at room temperature 5 – 10 minutes to thaw a bit before scooping.  

*Maybe next time…  It’s quite likely that other brands of bitters will be equally delicious, though all will have different character (more or less robust, bitter, citrusy, etc.). I’ve only tried Peychaud’s in this recipe, but feel free to use any kind whose taste you enjoy; the flavor will come through in each bite. Same with the pears: I used Bartlett, but other ripe pears will also be wondrous: Warren pears are especially silky, as one example.

Posted in Baking with Spirits, Frozen Sweets, Sweets, Vegan | Tagged , , , , , , | 5 Comments

My kitchen table

Not long ago, I daydreamed almost daily about having a better dining space than my modest kitchen table. With even four people, it’s a tight squeeze – and its not-so-elegant view features the humming fridge, the well-worn stove, and an oft overflowing sink. Despite my good fortune to live in this pleasant house, I couldn’t help imagining larger dinner parties in a prettier setting, hosting more loved ones, and spreading out in more style.

Frosted fig torte on my kitchen table.

The day we were sent home in March, I left my office with a mountain of computer equipment and all the ergonomic accessories. I plopped down my workspace at this table without question, trying to balance the shock of sudden change with gratitude for my job and health. And as we all know well, the weeks went on.

Soon the insight surfaced that my kitchen had long been my creative place, my after-work play space. But now my office supplies towered from its corner: an incessant reminder of spreadsheets and salary scales, evenings and weekends included. A familiar feeling to many, these blurred boundaries were starting to get to me — even when I draped the evidence in fabric.

Privileged to be able to work from home (let alone to have a job), I felt rather extravagant when I recently got a small rolling desk that would fit alongside my table without taking it over. No longer would I need to balance my mouse on a cake stand and my keyboard on a cookbook!

A past Passover at my kitchen table.

And not unlike the candle-lighting rituals I once hosted right here, my new nightly ceremony of rolling my desk away has brought something wondrous to light: my kitchen table is actually a beloved place. Smoothing the cottony wrinkles of a fresh tablecloth with my hands, I am overcome with thankfulness to have this sacred space back.

Sweet pea spring cake on my kitchen table.

In line with the message we seem to keep getting these months – Take nothing for granted! – I cherish my memories at this very setting: minute but marvelous indoor meals and crafts with friends, impromptu visits with my dad, my young nephew devouring a ripe nectarine directly from the fruit bowl, juice running down his chin.

And while I admit I yearn for visits with my loved ones today, I’m simply thrilled to have begun again sharing coffee here with my husband, piling the fruit bowl with the season’s harvest, and serving and photographing my desserts on this sweet little sunlit stage.

Cherry rosemary cupcakes on my kitchen table.

Looking back further, I remember, too, that the majority of my childhood at my Grandma’s treasured house was spent at her own kitchen table, despite the fancy dining room just footsteps away. Quite young, my sister and I even secretly tape-recorded dinner conversations underneath that table: a juvenile joke that captured a dose of quotidian magic. (You bet I still have those tapes.)

Maybe one day I’ll fondly remember doing office work at my kitchen table. For now I am relishing it being exactly what it is and has been: a compact but inviting place to pause peacefully, a favorite corner in the lovely home that hosts my lucky life.

I know I’m not the only one. What are your favorite moments at the kitchen tables in your life? Please ponder, and perhaps even share below.

Posted in Sweets | 6 Comments

Brown Butter Hamantaschen

I’ve always loved hamantaschen, the triangular cookies named after the villain of the Purim story (more about that here). But the traditional white dough can taste plain and almost pasty, even if it surrounds a pocket of sweet filling in a playful shape. Also, the process of making them has a reputation for being tricky, whether they open and spill in the oven, or crack when being filled and folded.

So I’ve added new twists to hamantaschen over the years, and this time I decided to incorporate toasty browned butter (which a friend of mine rightfully calls “a total kitchen game changer”). By pre-cooking the butter until it’s golden brown and fragrant, the cookie dough is imbued with a rich, warm depth and a hint of nuttiness. And here, the butter’s charred bits are kept intact (without straining), which adds a faint whisper of complementary smoke. Finally, I paired it with molassesy brown sugar instead of white, and created a soft and tender roll-and-cut dough. 

Traditional fillings are poppy seed, prune, and apricot — all of which are delightful — but for this recipe I chose raspberry preserves, since its tartness balances nicely with all that buttery warmth. (Really, you can choose whatever jammy filing you wish, minding the two tips I share below.)

After a pre-oven stint in the freezer to help them hold their shape, the cookies’ edges can be swept with a tad of leftover butter then dipped lightly in salty sugar. This creates delicately crusted corners whose satisfying seasoning really highlights the butter within. Lastly, baking the hamantaschen up high in the oven ensures a toasted texture from top to bottom, all surrounding the soft, fruity center they’re known for.

Purim is a truly lovely occasion for these cookies, but I’ll be making them all year long.

Brown Butter Hamantaschen

Makes about 30 cookies

  • 1/2 cup (4 ounces/one stick) unsalted butter
  • 3/4 cup (5.3 ounces/150 grams) dark brown sugar
  • 1 large egg
  • 1 teaspoon pure vanilla extract
  • 2 cups (10 ounces/286 grams) all purpose flour, plus more for rolling and cutting
  • 1.25 teaspoons baking powder
  • 1/2 teaspoon table salt
  • 2 tablespoons half & half (or cream, or whole milk)
  • 1/2 cup raspberry preserves or jam*

For the optional salty-sugar crust:

  • 1/4 cup granulated sugar
  • 1/2 teaspoon table salt
  • leftover brown butter (see recipe)

*Use a thick (not runny) jam or preserves; I prefer raspberry. Try to choose one that does not contain high fructose corn syrup; its concentrated sugar elevates the heat and can cause filling to bubble up and leak from the cookies.

Melted brown butter, still hot in the pan.


In a small saucepan, place the butter over medium heat until melted. Allow butter to cook and bubble, staying nearby. Using a heatproof spoon or whisk, stir regularly and scrape bottom of pan to prevent burning. Beware of hot butter spatters. Watch closely, letting butter become golden brown in color with a nutty fragrance. 

Remove from heat as soon as this point is reached; it can burn quickly. Let browned butter cool to at least room temperature, ideally enough that it has thickened some — not refrigerated and waxy, but ideally not liquid either. This will take about an hour in a cool kitchen, or can be done a day or two ahead.

(If you’re short on time and need to hasten the butter cooling process, transfer the butter to a cool heatproof bowl instead of leaving it in the warm pan. It’s not the end of the world if you use it in liquid form for the dough — as long as it’s no longer warm — but your dough will be softer and might feel floppy or tear easily, requiring a bit of fridge time before assembling the cookies.)

Stir the cooled butter to ensure any brown speckles are dispersed evenly. Measure out 1/3 cup of it, and place in a mixing bowl with the brown sugar. (Reserve the smidgen of remaining brown butter for the optional sugar crust, or for your own use; it’s divine on so many foods, sweet or savory.)

Beat butter and sugar on high until smooth and becoming pale. Add egg and vanilla; continue beating until texture is even and smooth, scraping sides of bowl with spatula if needed.

Sift flour, baking powder, and 1/2 teaspoon salt over the bowl. Mix until a crumbly dough is beginning to form. Add half & half, mixing until dough wants to stick together. Use hands to form dough into a ball; cover and set nearby.

Dough will be rather soft, which I find nice for the folding process — it tends to bend easily and not crack. Keep in mind that the floured equipment will firm up the dough some. If you find it too soft to work with, try refrigerating for 10-15 minutes, then knead gently with hands. (You can also wrap dough and refrigerate up to two days; be sure to bring it back to room temperature before rolling and cutting.)

Lightly flour a flat workspace and rolling pin. Start with about a quarter of the dough; leave the rest covered to prevent drying. Roll it flat to a thickness of 1/4 to 1/6 inch (about 5 mm). Using a floured 2.5 inch (6.5 cm) round cookie cutter, cut rolled dough into circles. 

Two cookies made with the pinch method, one which opened.


Add a dollop (a little over a 1/2 teaspoon) of jam in the center of each circle. Gently fold up edges of edges of each circle to create a triangle, closing edges very firmly. There tend to be two main methods for this process: first, what I call the fold method, which I used for most of the cookies pictured here. It offers three clear steps, and tends to be slightly more secure in terms of the cookie staying shut. Second, there’s what I call the pinch method, which is quick and simple, and can result in a cleaner looking cookie, but can be slightly less reliable in terms of staying shut. 

For either method, work one cookie at a time, and use a floured flat spatula to transfer each filled cookie to a parchment-lined cookie sheet. (If a cookie sheet won’t fit in your freezer, use a parchment-lined plate.) Repeat, re-flouring your equipment along the way.  Place filled cookies in freezer for at least 30 minutes; this will both firm them up for easier handling and will ensure they hold their shape while baking. If not baking the same day, cover before freezing, and freeze up to two weeks.

When ready to bake, position an oven rack at the highest level, and preheat oven to 375 F. If desired, make the salty sugar crust while oven preheats: In a small bowl, whisk granulated sugar with 1/2 teaspoon salt. Melt the remaining brown butter. Working with one chilled cookie at a time, use your finger or a pastry brush to lightly apply a bit of butter along cookie’s outer edges, then dip edges in salty sugar.

Brown butter hamantaschen, sans salty-sugar crust (and still delicious!)

Arrange chilled cookies on parchment-lined baking sheet at least an inch and a half apart from one another. Bake on top oven rack 10-12 minutes, or until both their top and bottom edges are golden brown. Remove from oven, and let cookies cool completely before eating (the filling stays quite hot!). Cover cooled cookies and eat within two or three days.

:::::

Maybe next time…  I’ve enjoyed orange marmalade in these cookies; like raspberry, it offers a pleasantly contrasting tartness that plays well with the warm flavors, but it can be slightly runnier, so use it chilled. In addition — despite the fact that baking ingredients are almost always called for at room temperature — I tend to use both my egg and sugar chilled for this recipe (I actually store all my sugar in the fridge, thanks to ants.) It’s not necessary to chill yours, but it doesn’t hurt to use an egg straight from the fridge, for instance, since the dough is so soft. Finally, beware of playing with different flours. In my recipe testing, I first experimented with a portion of whole wheat flour which changed the dough’s texture enough that the cookies were quite frustrating to assemble. 

:::::

Check out my videos on the fold and pinch methods below!


Posted in Cookies & Bars, Sweets, Traditional with a Twist | Tagged , , , , , | 1 Comment

Candy Cane Coconut Sherbet

For decades, my Grandma re-used the same dusty candy canes on her Christmas tree. So as a kid at her house, I was neither allowed to eat them nor tempted by them. While I’ve long loved them as an adornment, it took me years to discover that I also cherish them as a holiday treat.

Today, I find myself eagerly bringing home a big batch of candy canes to nosh on each winter. I savor their refreshing, minty sweetness and whimsical, snack-friendly design. It was only a matter of time until I finally gave them a nod in my own holiday dessert.

I decided on a cool, creamy sherbet to highlight their beloved flavor, with just the right amount of candy to keep the mint’s intensity at bay. Light coconut milk would provide a bright, velvety backdrop for a not-too-heavy treat. I added the perfect pinch of salt and vanilla bean to provide balance, and a splash of rum that offers a tinge of flavor and warmth, meanwhile keeping the sherbet from freezing too hard.

The result is a delightfully delicate frozen treat that showcases the candy canes’ subtle but unmistakable peppermint, alongside a whisper of soft coconut. Its vanilla and rum notes harmonize deliciously with the minty, creamy base — adding up to a sherbet that’s refreshing, light and satisfying, but not overly sweet. What’s more: it happens to be dairy-free and usually vegan (see note).

Candy Cane Coconut Sherbet
Makes about 5 cups

Like many frozen dessert recipes, this one requires some lead time for chilling and freezing, though the steps are all quite easy. I like to start 24 hours ahead of serving time, beginning with melting the candy candy canes into the coconut milk. Once the mixture is thoroughly chilled, the churning and a generous stretch in the freezer are all that’s needed.

Ingredients*:

  • 1/4 cup (2 ounces or 56 grams) granulated sugar
  • 1/2 teaspoon table salt
  • half a vanilla bean or 1/4 teaspoon vanilla bean paste/powder
  • 5 ounces (140 grams) peppermint candy canes, from 10 standard size candy canes
  • 3 13.5oz cans (5 cups plus 1/2 ounce) light coconut milk (not full-fat)
  • 2 tablespoons coconut rum (about 42 proof), OR 1 tablespoon plain clear rum (80 proof or lower), chilled

Place sugar, salt, and vanilla bean in a small to medium saucepan. Unwrap candy canes and break them into thirds or quarters; add to saucepan. Add the light coconut milk.

Place over low heat and whisk regularly, until candy canes have completely melted.

Watching closely, let mixture simmer for 2-3 more minutes, then quickly remove from heat (avoid letting it come to a boil; it can suddenly bubble up and spill over).

Keep pan uncovered to avoid condensation, and stir occasionally while mixture comes to room temperature. Once cooled, cover and place in refrigerator. Chill thoroughly, until very cold — ideally for at least 8 hours. Meanwhile, place rum in freezer.

When ready to churn the chilled mixture, whisk it well, and add half the cold rum (1 tablespoon if using coconut rum; 1.5 teaspoons if using plain rum), whisking until fully incorporated. Keep remaining rum in freezer.

Pour mixture through a sieve into the bowl of your ice cream maker. This will catch your vanilla bean husk and any coconut solids. (Check machine instructions; it may need to be churning before you pour in the mixture.)

Following your ice cream maker instructions, churn mixture thoroughly, until at least soft serve consistency.

[Note: Every once in a while, the mixture will stubbornly not thicken past about smoothie consistency when churned, even when the rum is omitted. This seems to be an effect of varying ingredients in different brands of candy canes. If this happens, don’t worry – just pour the mixture at its maximum thickness into your container, and freeze it an extra hour or two.]

Quickly mix in the second half of the cold rum (1 tablespoon coconut rum or 1.5 teaspoons plain rum).

Immediately spread sherbet into a 9 x 5″ loaf pan (or another freezable container that’s easy to scoop from). Working quickly, cover sherbet with a lid or foil, and place in freezer. Freeze until scoopable consistency (usually a minimum of 6 hours).

When ready to serve, remove sherbet from freezer and, if too hard to scoop, set on counter for 5 minutes to let soften. Serve and enjoy. It’s lovely plain, or with a pinch of cacao nibs or crushed candy canes for complementary crunch. Sherbet tastes freshest within a day of freezing, but leftovers can be covered tightly in freezer and eaten within week.

*Notes on ingredients:

  • After experimenting with full-fat coconut milk, I found that light coconut milk is superior for this sherbet, as it prevents separation of waxy coconut oil and is just less heavy. The result is not overtly coconutty, so even my coconut-averse friends have proven happy with this treat.
  • While I don’t tend to like flavored liquor, I admit I prefer the coconut rum in this recipe for both taste and texture — but as noted, plain rum in half the volume works well, too. Do not use more rum than noted, or the sherbet won’t freeze properly.
  • No rum? You can skip it, or use a total of two teaspoons vanilla extract in its place if you don’t mind a more pronounced vanilla flavor than the vanilla bean yields, alongside the delicate peppermint and coconut. Without rum, it will be a bit stiffer to scoop, but nothing a few extra minutes on the countertop can’t remedy.
  • Candy canes can be replaced with peppermint sticks, of course. Beware of pre-crushed candy canes which sometimes have additives and additional flavorings; I’m not sure how they’d affect the outcome here. Sometimes these additives include confectioner’s glaze which is technically not vegan: an important factor for many. A tip for peeling that pesky wrapper from a candy cane: pull the plastic outward, 90 degrees, rather than straight down.

Broken candy canes, sugar, and vanilla bean powder awaiting coconut milk.

Posted in Baking with Spirits, Frozen Sweets, Sweets, Traditional with a Twist, Vegan | Tagged , , , , , , , , , | 6 Comments

Honey Apricot Cookies

I recently found a very special jar of honey on my front porch. Across the metallic lid was the address label of a cherished neighbor who had recently passed away. An attached scroll of paper was filled with her husband’s words, offering gratitude and the extraordinary story of the honey’s origin.

In her illness, his wife assured him that bees would come and make honey in their backyard, just like he wished. Shortly after her declaration, a swarm of bees voluntarily moved into his old, empty bee boxes. Not only did they show up and survive the winter without help; they also produced an ocean of honey, leaving the family with a dose of sweetness not long after their beloved had departed.

What an honor to be a recipient of this beautiful treat.

Upon tasting the honey, I was delighted by its depth and its slightly herbal notes, along with its unique richness that echoed fresh butter with a hint of spice. I couldn’t help but daydream of a new sweet creation that would both complement and highlight the honey in a buttery, fruity format.

With summer stone fruit in full swing, I reached for vibrant apricots, known to become jammy and intensify in flavor when baked. (I first tried nectarines and peaches, but their flavor faded in the oven and their texture didn’t hold up as well as apricots, which I realized I hadn’t baked with for quite a long time.) The soft-baked, tangy apricots proved perfect as a topping for my new cookies.

A crisp, light shortbread-like base seemed a natural choice, and a petite spoonful of honey would be showcased in each cookie’s wide, shallow imprint. I found that the cookies invited a pinch of herbs and spice — and cinnamon and rosemary made a scrumptious pairing (though they’re certainly optional, as the “plain” version offers plenty of nicely balanced flavor amid a delicious simplicity). 

The result is a satisfyingly buttery, honey-rich cookie with a lovely whisper of salt, all topped with a burst of tart, luscious fruit.

When I brought a plate of these cookies to my beekeeping neighbor, he mentioned that the bees have disappeared now, and expressed that the honey felt heaven-sent. I realize that cookies are very insignificant in moments like these. But my wish is that, somehow, this circle of sweetness might bring a moment of comfort, or better yet, hope.

Honey Apricot Cookies (Makes 20)

  • 1 cup (5.3 ounces/150 grams) all-purpose flour
  • 1/2 teaspoon salt
  • 3 tablespoons (1.5 ounces/43 grams) dark brown sugar
  • 1/2 cup (4 ounces/113 grams) unsalted butter, quite soft but not melted
  • 2 tablespoons good quality honey
  • 3 medium to large apricots, ripe but firm
  • Optional: up to 1 teaspoon each ground cinnamon (preferably Ceylon) and powdered dried rosemary*, whisked together

Line cookie sheets with parchment paper; set aside.

Sift flour and salt into a mixing bowl. Add brown sugar and stir gently. Add butter and beat well, until moist crumbs have formed and dough sticks together. Use hands to shape dough into a cohesive ball; knead gently if needed.

Separate dough into pieces about a scant tablespoon a piece, weighing 15 grams or 0.5 ounce each. Shape each dough segment into a ball, then flatten and indent slightly, directly onto the parchment-lined cookie sheets, creating 1.75″ diameter cookies with a centered 1″ indentation. Avoid pressing all the way through and/or making the bottom too thin/translucent; you want to create a sturdy, wide basin for the honey. If the wall of the cookie cracks, gently smooth with your finger. Keep cookies at least 1.5″ apart from one another as you arrange them on the baking sheets.

Fill each cookie with 1/4 teaspoon honey; do not fill to the brim. (You may end up with a little honey left over.) If desired, add small pinches of the cinnamon-rosemary blend around the edges of some or all cookies. Freeze the filled cookies for at least an hour.

Meanwhile, rise and dry apricots. Halve the apricots and remove pits. Slice each half into quarters, crosswise, to create eighths. (You may need a different division if your apricots are particularly large or small. The goal is 20 pieces that fit nicely across each honey puddle.) You may have a few extra apricot pieces.

Preheat oven to 325 F with a rack centered between top and bottom.

Working quickly, set an apricot piece cut-side-down onto each frozen cookie, centered in the puddle of honey. Bake for about 20 minutes, one rack at a time. When finished, edges of cookies should be golden brown and dough should look dry. Let cookies completely cool on baking sheets before moving or eating. Keep cookies covered and chilled if not eating the day they’re baked.

Maybe next time… Instead of hand shaping, you can bake these cookies in a mini muffin pan. Be sure to line the pan with mini muffin papers first (or grease it very generously) and indent each cookie deeply using a finger in the center before filling and freezing. You may need to use smaller pieces of apricots for this format.

In my experience, twenty addictive cookies go fast; feel free to double this recipe.

If adding spice, a pinch of nutmeg swapped in for the cinnamon would also be divine.

*To powder rosemary, place dried rosemary (without the thick, woody stems) in a spice grinder (a.k.a. blade coffee grinder) and pulse until powdered, or try a mortar and pestle.


Posted in Baking with Herbs, Cookies & Bars, Sweets, Traditional with a Twist | Tagged , , , , , , | Comments Off on Honey Apricot Cookies