Thanks for stopping by! Please enjoy my recipes and musings listed below or from the blog feed. All photos and recipes my original creations; more about me here. Site improvements are coming soon; thanks for your patience. Happy baking!
Cakes, Tortes and Cupcakes:
- Aperol Spritz Cupcakes with grapefruit & prosecco
- Apple Almond Sherry Cake
- Beautiful Beet Cupcakes
- Blood Orange Poppy Seed Cake
- Blueberry Basil Bourbon Cupcakes
- Buttered Rum Cake
- Brown Sugar Soy Sauce Skillet Cake
- Buddha’s Hand Citron and Pistachio Pound Cake
- Cauliflower Cake with Citrus and Vanilla
- Celery Ginger Cake
- Cherry Rosemary Cupcakes
- Cherry Skillet Cake
- Chocolate Orange Cake with black olives
- Chocolate tea cakes with raspberry and lavender
- Bite Sized Coconut Cakes
- Double Plum Torte with vanilla steeped prunes and maple syrup
- Egg Nog Cake
- Fresh Fennel Bulb & Lemon Cupcakes
- Fresh Fig Torte, Frosted & Spiced
- Gin and Tonic Cake with juniper berries
- Grapefruit Cake with Grapefruit Curd
- Green Artichoke Cake
- Hazelnut Cake (my favorite cake, ever)
- Hibiscus Buttermilk Cake with lemon
- Jicama Lime Cake with Tequila Nectarines
- Kumquat Cake, Caramelized with whiskey and mascarpone
- Lavender Blueberry Cake with poppy seeds
- Lemon Yogurt Cupcakes
- Lemonade Cake with or without sweet corn
- Macadamia Cake with pure macadamia oil
- Mimosa Cupcakes (orange and champagne)
- Pink Pearl Apple Skillet Cake with pink peppercorn, lemon, and cornmeal
- Purple Potato Cupcakes with fresh ginger and molasses cream cheese frosting
- Rhubarb Banana Skillet Cake with ginger and orange (vegan)
- Rose Cupcakes made with buttermilk and rosewater
- Strawberry Lemon Cupcakes
- Sunroot Spice Cake (a.k.a. Jerusalem artichoke or sunchoke)
- Sweet Pea Spring Cake made with green peas
- Tea and Sympathy Cake made with Earl Grey tea and Grand Marnier
- Tomato Spice Cake made with fresh tomatoes
- Violet Candy Cupcakes
- Walnut Pear Torte
- White Cake/Naturally Dyed Rainbow Cake
Cookies, Bars and Meringues:
- Almond Butter or Peanut Butter Cookies
- Almond Cornflake Bars
- Apple Raisin Cornflake Cookies
- Apricot Bars with Rosemary
- Chewy Carrot Sandwich Cookies
- Coconut Grapefruit Cookies (vegan)
- Cranberry Caper Cookies
- Cranberry Clove Thumbprints
- Fruit-filled Almond Cookies with fresh grapes, blueberries, or cranberries
- Granola Peanut Butter Cookies
- Hamantaschen, Brown Butter
- Hamantaschen, Rosemary Almond Brown Sugar, filled with ice cream
- Hazelnut Brown Sugar Cookies
- Herbes de Provence Shortbread with Lemon Curd Filling
- Juniper Gin Cookies with lime zest and vanilla bean
- Lavender Biscotti
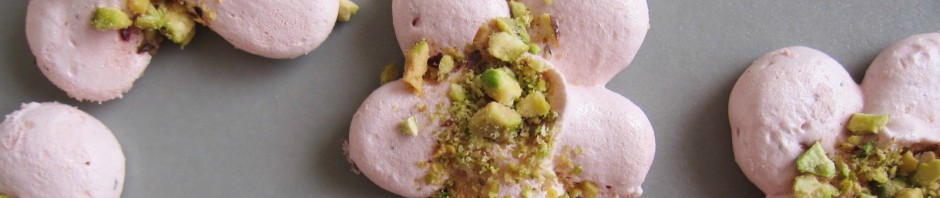
- Meringues, Hibiscus Pistachio
- Meringues, Lemongrass
- Meringues, Peppermint Leaf
- Meringues, Raspberry Poppy Seed with Raspberry Liqueur
- Meringues, Striped with Color
- Meringues, Turkish Coffee
- Meringues, Wasabi White Chocolate
- Mulberry Oat Cookies with browned butter and nutmeg
- Nasturtium Thumbprints (my first post!)
- Orange Cardamom Cookies with orange marmalade and chocolate drizzle
- Orange Cocoa Springerle
- Paneer Peach Cookies with cardamom and bourbon
- Peach Cinnamon Sandwich Cakes
- Pear Clove Sandwich Cakes
- Pecan Brown Sugar Cookies with Coffee Liqueur Glaze
- Pistachio Blackberry Spiral Cookies
- Pistachio Crunch Cookies
- Raspberry Basil Shortbread with brandy glaze
- Rhubarb Rum Sandwich Cakes
- Rhubarb Rye Shortbread
- Rooibos Tea Macarons with fresh mango
- Rosehip Graham Crackers, miniature
- Salted Spritz Cookies (mini, buttery, addictive!)
- Sazerac Cookies (Absinthe, lemon, aniseed)
- Sesame Halvah Cookies drizzled with chocolate
- Sesame Matzah Bars – with almond and orange
- Sweet Almond Cherry Bars
- Whiskey Fig Browned Butter Bars
Pies, Tarts, Cheesecakes, Candies, and more:
- Banana Cardamom Bites with cocoa shell
- Bitters and Pear Sorbet
- Campari White Peach Sorbet
- Candy Cane Coconut Sherbet
- Cilantro Sultana Mini Pies, honey sweetened
- Cranberry Curd: a custard/condiment
- Dijon Mustard Honey Cream Caramels
- Dragon Fruit Sherbet with Lemongrass and Strawberry
- Egg Nog Cream Pie with gingersnap crust
- Fig, Mascarpone & Cardamom Custard Pie
- Lychee Butter, a creamy sweet dessert condiment
- Mango Meringue Pie, coconut macadamia crust
- Naan Bread Pudding, cardamom caramel sauce
- Nutty Orange Poundcake Bites with Jack Cheese
- Oatmeal Raisin Hazelnut Pie
- Quince Skillet Tart with almond paste and cranberries
- Passion fruit cream cheese bites (no bake)
- Persimmon & Mandarin Orange Pie
- Pomegranate Pumpkin Cheesecake with pomegranate aril crust
- Reverse Lemon Meringue Pie (custardy filling, crisp meringue crust)
- Sorrel “Shortcake” with Fresh Cherries
- Smoky Coconut Caramels (vegan)
- Strawberry Cream Pie with vanilla bean, custard, and rum
- Tart Mandarin Orange Cheesecake
Posts without Recipes:

What a handy list!
Where did you find dried mulberries?
Hi Heather, Are you in the east bay? I recommend Delightfully Turkish brand; they come in a prepackaged bag and tend to be near the dried fruit. El Cerrito Natural carries them and probably Berkeley Bowl. Thanks for stopping by!
Hi again! Just a note that I spotted them also at Whole Foods on the dried fruit aisle.
I have never been interested in baking, but you have made a new woman out of me. I cannot wait to try your beautiful recipes. Absolutely Gorgeous blog. Your writing is superb and your pictures are good enough to eat.
Thanks so much, Barb! I appreciate you stopping by and sharing your kind words. If you do try a recipe, I’d love to hear about it. Bon appetit!
________________________________
Pingback: Buttermilk Rosewater Cupcakes | butter, sugar, flowers