Sweet Almond Cherry Bars

It’s funny how a recipe can evolve, branch off, and even come full circle. A couple of years ago, I was determined to make a new blondie-like bar cookie with cherries in it. I played around and came up with a first draft but wasn’t happy with the texture. By the time I was able to revise the recipe, cherries were out of season, and eventually my browned butter fig bars were born. (Not a bad place to land; they’re a big favorite!)

About a year later, I made a  delightful cranberry quince version of the bars (a scrumptious combination) and added sweet almond paste to the batter. But those, too, needed some revising — and once again, before I could finalize the recipe, quince had disappeared from the market. So here I am, back at the beginning with cherries. This time, I brought along the sweet almond paste and everything I learned along the way. And cherry season is still in full swing as I write this. Huzzah!

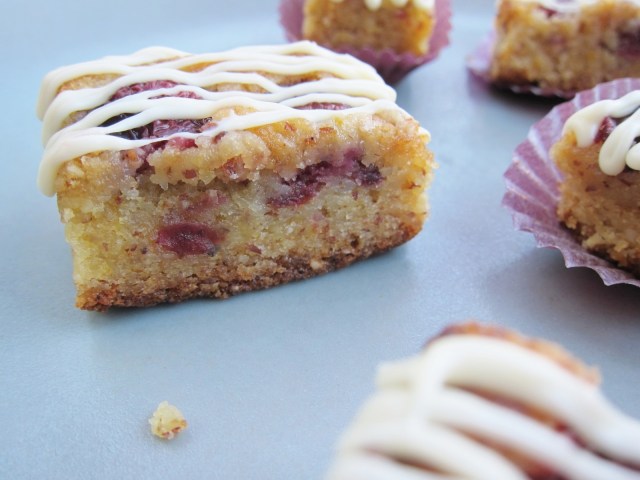
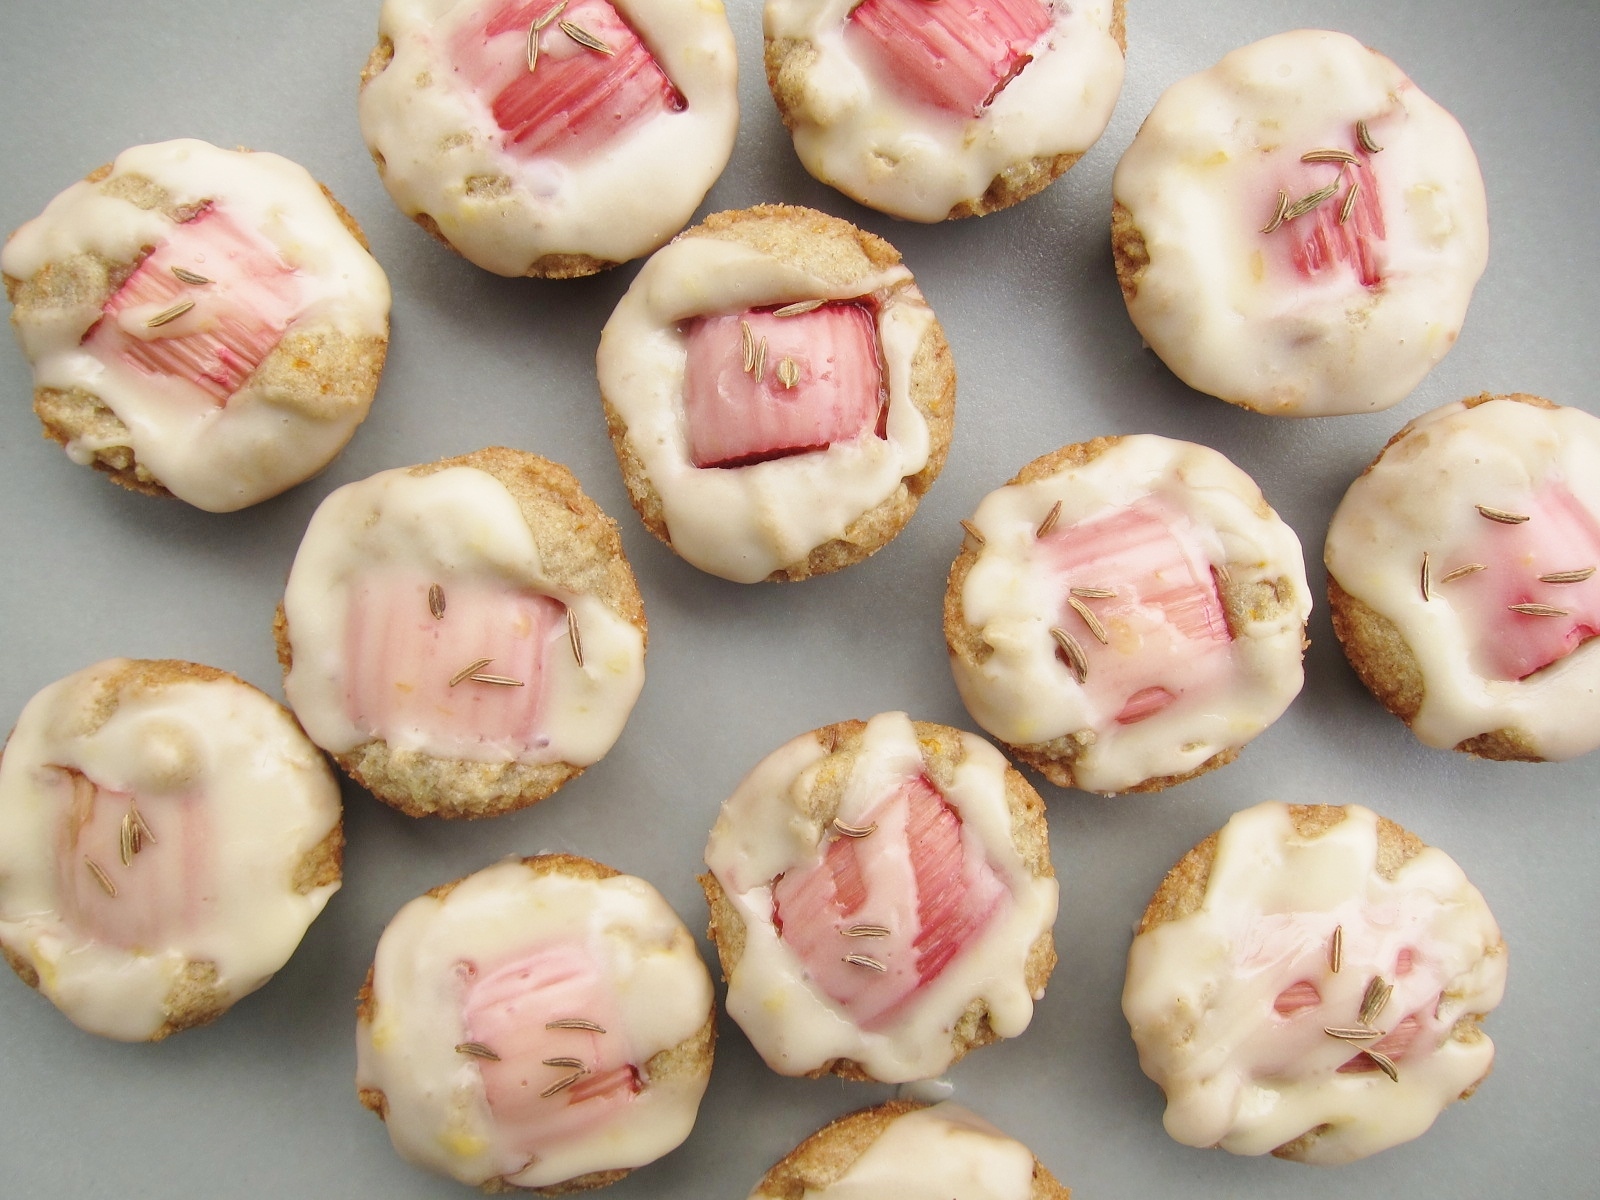
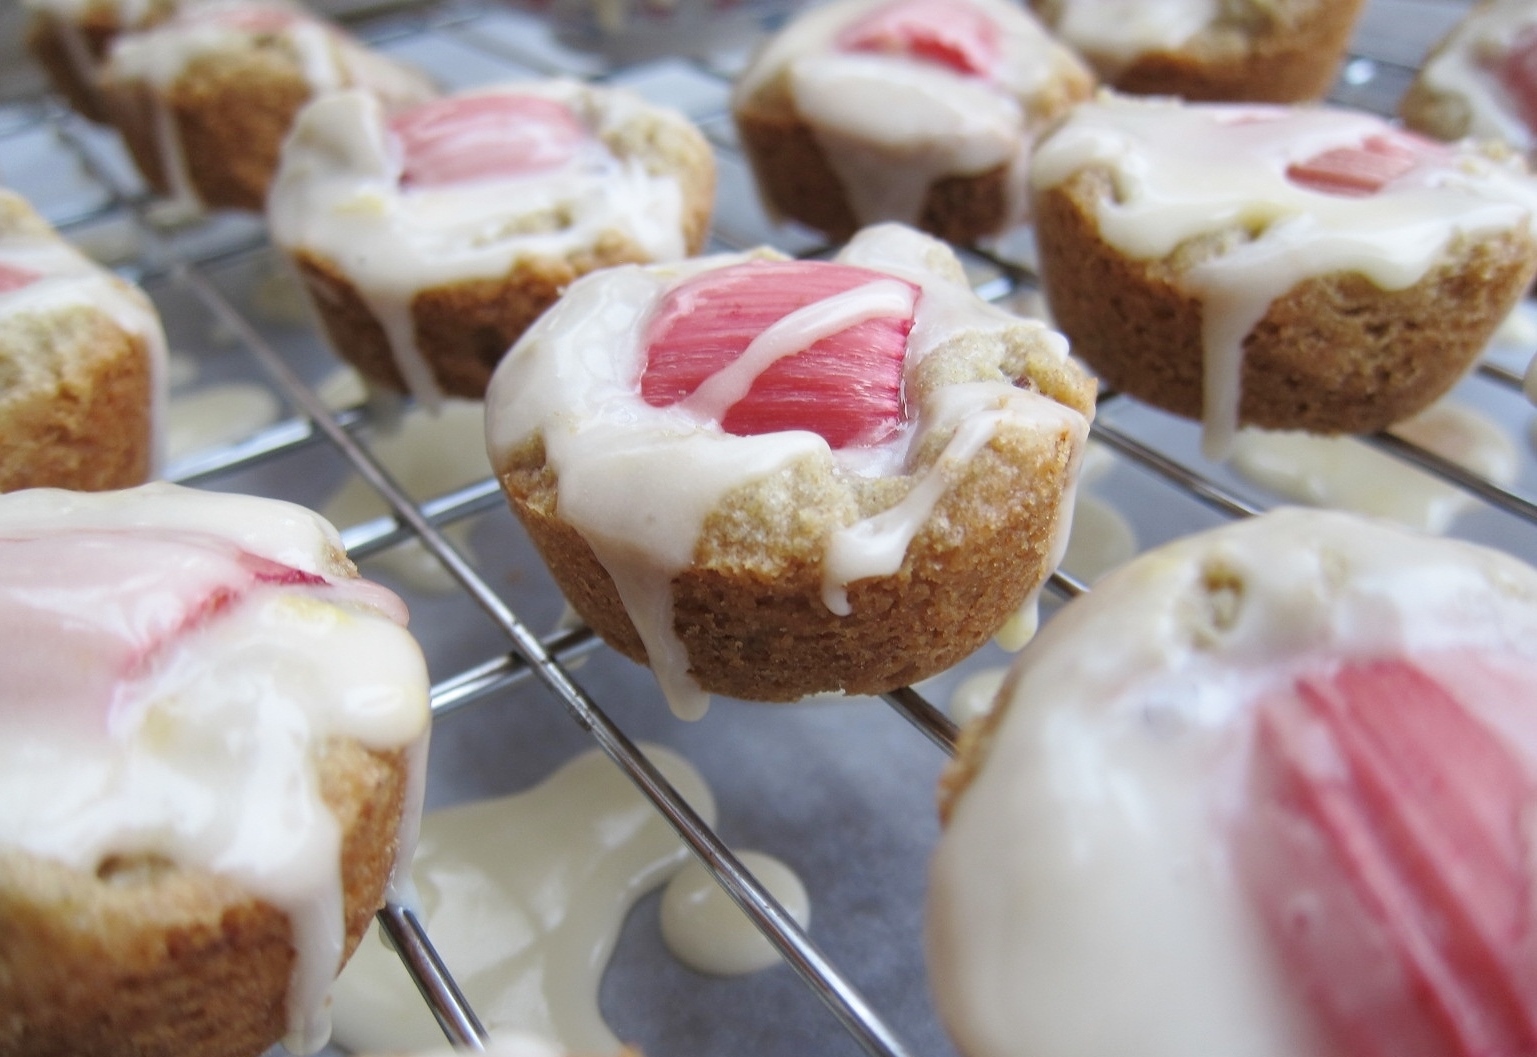
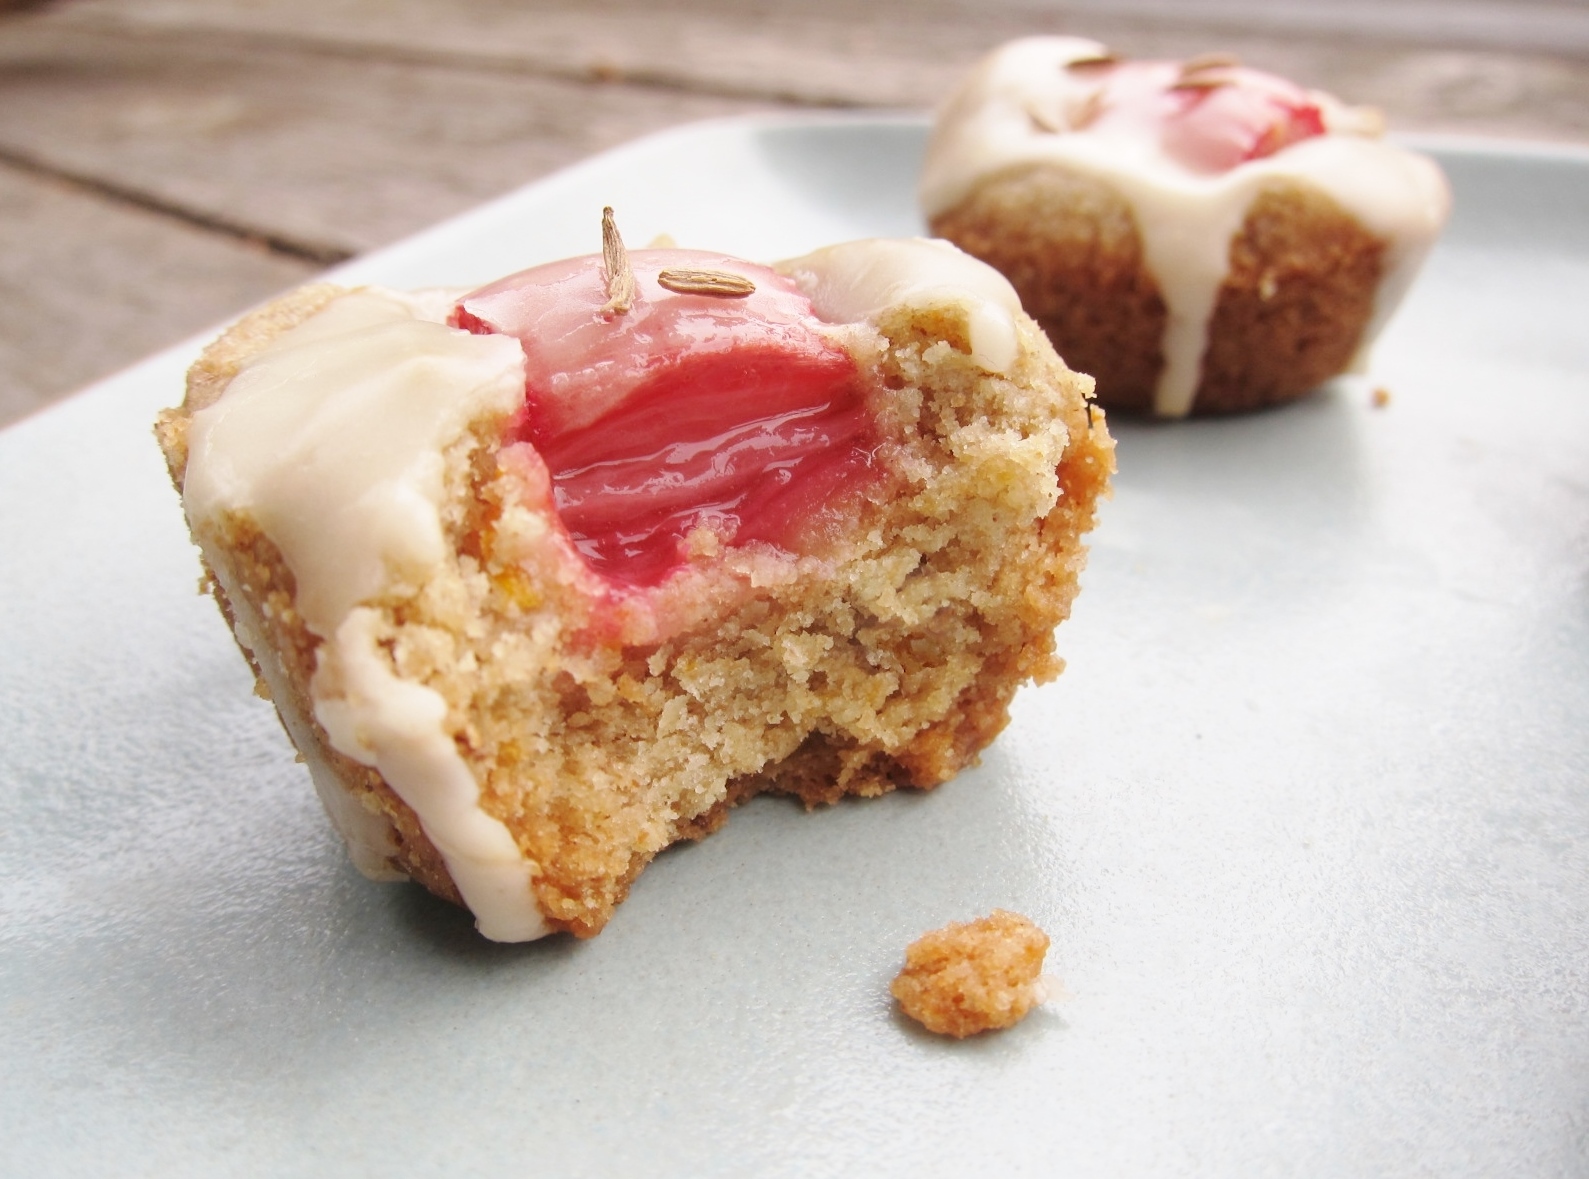
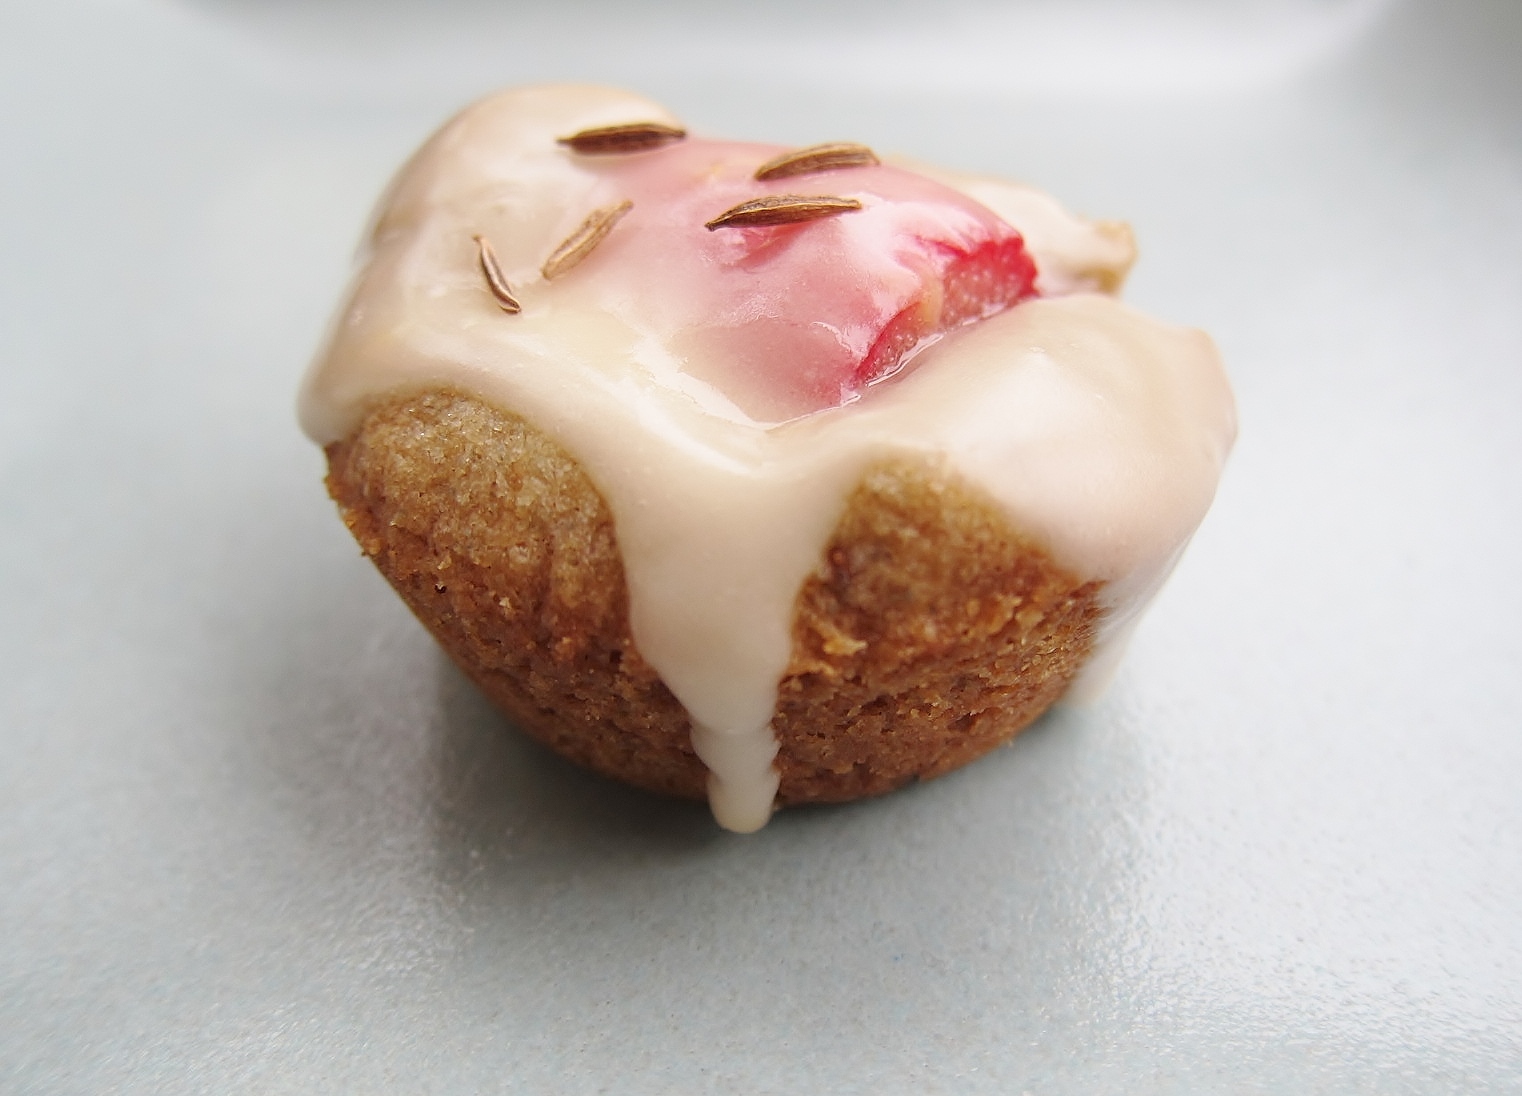
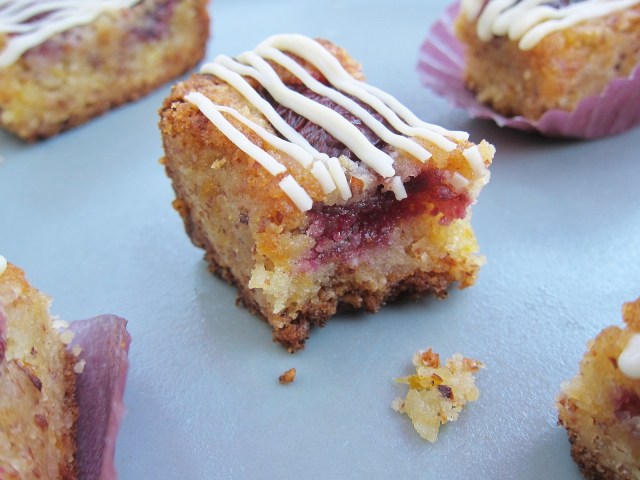
With softened almond paste beaten into creamy butter, a burst of bright orange, and warm vanilla, these bars offer a fantastic flavor balance. Thanks to the two-level baking method, the bottoms and edges are toasty and sturdy, but the bars remain moist and soft inside — a perfect bed for jammy, wrinkled baked cherries. Amaretto-y and not too sweet, they can be drizzled with complementary white chocolate, or not — and they’re as welcome on the breakfast table as they are after dinner.

Cherry Almond Bars
[makes 20-40 sliced cookies, depending on size]

  • 1 cup (4 ounces / 113 grams) almond meal*
  • 1 cup (5 ounces / 140 grams) all-purpose flour
  • 2 teaspoons baking powder
  • 1 teaspoon salt
  • 7 ounces (198 grams) firm blanched almond paste, softened/lukewarm*
  • 6 ounces (170 grams) unsalted butter, softened
  • ¾ cup (5.3 ounces / 150 grams) granulated sugar
  • 3 large egg yolks
  • 1 teaspoon pure vanilla extract
  • 1 teaspoon pure almond extract
  • finely grated zest of one orange*
  • 13.5 ounces (383 grams) halved, pitted cherries (from about 1 pound whole cherries)*
  • Optional: ½ cup (3.5 ounces / 100 grams) white chocolate, chopped or chips*

Position one oven rack in the lowest position and one at middle height. Preheat oven to 350 F.

Prepare a 9×13” baking pan: If using a pan from which you’ll be cutting the bars directly (such as glass), simply grease it. If using a pan from which you don’t want to cut the bars directly (such as metal or ceramic that scratches easily), grease sides lightly and line bottom with a generous sheet of parchment that hangs over on the long edges (you’ll use it as a sling later). Set prepared pan aside.

In a medium bowl, whisk almond meal to remove any lumps. Sift flour, baking powder, and salt over the almond meal. Stir until blended. Set aside.

In a large mixing bowl, beat the butter and sugar on high until fluffy. Reduce speed to medium. With mixer on, gradually add the lukewarm (soft) almond paste, in grape-sized pieces. (I pinch pieces off the log of almond paste and toss them in.) Once all almond paste is added and incorporated, beat in the egg yolks one at a time, followed by the extracts. Stopping to scrape bowl often, add the dry ingredients and mix until incorporated. Finally, fold in the orange zest until evenly dispersed.

Transfer dough to prepared baking pan and spread evenly to edges. Add the cherries, cut side down in rows close together, and press them down gently. Keep in mind that they’ll shrink and will want to move around while baked.

Bake on the bottom rack for 10-15 minutes (10 minutes if your pan is glass or very dark metal, or if your lowest rack is especially close to the heat source. More time is needed for lighter colored metal pans and ceramic pans). Move pan to center rack and bake 20-25 minutes (longer if the bottom-rack step was shorter). A total bake time of 40-45 minutes is generally about right. When ready, edges will be browned, area between cherries should look toasty, and cherries will be wrinkled. Remove from oven and let cool completely in pan to room temperature.

If you used parchment, gently lift the cookie slab and transfer to a cutting board, and carefully remove and discard the parchment.

Using a sharp knife, cut the bars as desired (my favorite is on the smaller size: two cherries per bar, but twice that size is also great). Transfer to a rack if adding the drizzle.

Make the drizzle: Gently melt white chocolate in a double boiler or in 20 seconds spans in the microwave. Stir regularly and stop heating just when you can stir the pieces smooth. If desired, whisk in a couple of drops of almond extract. Transfer white chocolate to a pastry bag fitted with a writing tip, or a plastic sandwich bag with a tiny corner cut off. Drizzle over the cookie bars in zigzagged stripes. Let drizzle cool and dry.

If desired, transfer cookies into paper cupcake liners to serve. The bars taste lovely at room temperature and are also quite delightful when chilled. Store in a closed container for up to two days at room temperature or up to five days in the fridge.

*Maybe next time…

Shown here, I used skin-on (unblanched) almond meal for its flecked texture and extra nuttiness, but blanched almond flour also works well and pairs particularly nicely with lemon zest in place of orange.

As for the almond paste, be sure to use the firm, sliceable kind such as Odense brand (not the runny kind that comes in a can).

If opting for the drizzle, use high-quality white chocolate with cocoa butter as one of its main ingredients. Or for a decadent alternative, try dark chocolate. Alternatively, a glaze made from powdered sugar and either citrus juice or liqueur would also be scrumptious and easy (Grand Marnier or Kirsch come to mind). To do so, just sift a cup of powdered sugar into a bowl, and add liquid very gradually, by the half-teaspoon, whisking until pourable but thick.

Finally, since fruit weights can vary, it doesn’t hurt to have some extra cherries on hand in case you need a few more to cover the bars. I prefer larger cherries which tend to stay in place and don’t shrink down as much as smaller varieties.

Posted in Cookies & Bars, Sweets, Traditional with a Twist | Tagged , , , , , | 2 Comments

Rhubarb Rye Shortbread

I admit it: I jump on the rhubarb bandwagon every spring. Once they catch my eye, the pink stalks distract and excite me, luring me in with their short season and tart, fruity flavor. This year, I’d gone to the market one afternoon looking for dinner ingredients, and instead came home with three pounds of rhubarb (whoops!). After a delicious experiment with sweet almond and a scrumptious batch of this, then these, I started craving something crisp, buttery, and new.

The mildly herbal and nutty flavor of rye bread had been on mind lately. (For me, it’s as delicious as it is nostalgic; my Jewish grandma swore by her pastrami on rye, said only in a Bronx accent.) After playing with some silky-soft rye flour, I quickly realized I was also longing for the signature caraway seeds that often accompany it — so I got myself some of those, too. With these two treasures and bit of vanilla and orange zest, my new shortbread dough was rich and flavorful with a whisper of earthiness: perfect for nestling a hunk of juicy, tangy rhubarb.

For sturdiness and a molded shape, I reached for my mini-muffin pan. The result was a satisfyingly crisp cookie whose structure held up to the succulent fruit while offering a delectable, buttery crumb. Finally, I topped them with a citrusy glaze that added the perfect sweetness (please don’t skip it — and if you want to booze it up a bit, see note at end of recipe). As a finishing touch, a sprinkle of crackly of caraway seeds heightened the optimal balance of warm and bright flavors.

Rhubarb Rye Shortbread
[makes about 16-18 mini-muffin sized cookies]

  • ½ cup softened unsalted butter, plus more for greasing pan
  • 4 ounces fresh rhubarb stalk(s), leaves and tough ends removed
  • 1 medium orange
  • 1 ½ teaspoons caraway seeds
  • ¼ cup granulated sugar
  • 2/3 cup rye flour
  • 1/3 cup all-purpose flour
  • ½ teaspoon salt, plus more for glaze
  • 1 teaspoon pure vanilla extract
  • ¾ cup powdered sugar

Preheat oven to 325 F with a rack placed in the center. Generously grease 16-18 cups of a mini muffin pan; set aside.

Cut rhubarb stalks crosswise into 16-18 pieces, each about ¾” wide. Set aside.

Rinse, dry, and finely zest the peel of the orange; set zest aside. Juice the orange, straining and discarding any seeds. Set juice aside for glaze.

Set aside ½ teaspoon whole caraway seeds aside for topping. Use a mortar and pestle or spice grinder to coarsely crush the remaining teaspoon caraway seeds.

Sift sugar, both flours, and salt into a mixing bowl. Whisk in the crushed caraway seeds. Add ½ cup butter and the vanilla; beat just until dough holds together. Beat in the orange zest until evenly distributed. If dough is stubborn about sticking together, knead gently using warm, damp hands.

Using one tablespoon of dough per cookie, distribute dough among the greased muffin cups. You should have 16-18 filled cups. Press a piece of rhubarb curved-side-up into the center of each dough ball, letting dough push to edges. Bake 20-25 minutes, until edges of cookies are toasty brown.

Let cookies cool in pan until room temperature, then remove and transfer to a wire rack placed over wax paper or a cutting board or platter. (If they’re stubborn about popping out, try gently wedging a toothpick or butter knife around the edge of the cookie.)

Make the glaze: Sift powdered sugar and a dash of salt into a bowl. Add the orange juice one teaspoon at a time, whisking well after each addition. You’ll need about four or five teaspoons juice total. Glaze consistency should be pourable with a slow drip – not too thin.

Spoon glaze over cooled cookies, allowing runoff over edges. Stir regularly while glazing cookies. If desired, scrape up the dripped glaze below and re-use. Working quickly, sprinkle each wet cookie with a small pinch of whole caraway seeds. Let icing dry completely until crisp, then devour! Keep extra cookies chilled or quite cool in a closed container.

Maybe next time… If you’d like to echo the rye flour with its boozy cousin, replace the orange juice in the glaze with rye whiskey; this will add a welcome warmth and kick. If you’d rather not use rye flour at all, feel free to replace it with all purpose flour for a more traditional shortbread; you can skip the caraway, too. In this case, lemon zest makes an equally delicious replacement for orange, if desired, and rosemary would be divine in lieu of caraway.

Posted in Baking with Herbs, Cookies & Bars, Sweets | Tagged , , , , , , | 2 Comments

Cranberry Caper Cookies

Growing up, my dad added capers (and anchovies) as a salty element to many of the delicious things he cooked: pizza, scrambled eggs, spaghetti sauce. While I’d never reach for anchovies in a sweet context, I found myself daydreaming of a dessert featuring briny, tangy capers not long ago. I admit it was partly nostalgia — I miss my dad a lot — but when I instinctively paired the capers with tart dried cranberries and barely-sweet chocolate, I found that the trio was meant to be together.

If you’re wincing at the idea of a caper on a cookie, I don’t blame you — they’re potent little suckers. But they’re usually pickled in nothing more than vinegar, water and salt: common and welcome ingredients in many desserts. Plus, their delivery here is in a tiny format — only two or three capers within a heap of tender cranberries and crunchy cacao nibs, all piled atop a bite-sized chocolate morsel. I like finishing them off with sprinkle of coarse sanding sugar for added beauty and crunch.

With Dutch process cocoa and a spoonful of espresso powder, the cookie dough serves as a deeply chocolatey base. The pinch of nutty cacao nibs, supple tart cranberries, and little bursts of salty caper are not only a lively combination of texture and taste — they’re delightfully complementary upon the tender cookie square.  Akin to a platter of fancy hors d’oeuvres with olives, jams, cheeses and fruits, these cookies bring together salty and sweet so pleasantly — and they’re equally nice with a glass of wine (or black coffee or tea).

Cranberry Caper Cookies
Makes 4 dozen small cookies

For the cookie dough:

6 tablespoons unsalted butter, softened
1/2 cup granulated sugar
1 teaspoon pure vanilla extract
1 egg
3/4 cup all-purpose flour
1/8 teaspoon salt
6 tablespoons Dutch process cocoa powder
1.5 teaspoons instant espresso powder

For the topping:

2 teaspoons water
remaining egg, from dough recipe
½ cup sweetened dried cranberries
3 tablespoons capers, drained from brine*
3 tablespoons crushed cacao nibs
1-2 tablespoons coarse sanding sugar (optional)

In a medium mixing bowl, beat the sugar and butter until smooth and fluffy. Beat in the vanilla. Into a separate small bowl, crack the egg and scramble it. Measure out two tablespoons scrambled egg; add it to the butter mixture, stirring until completely incorporated. Reserve the remaining scrambled egg for the topping.

Sift over the butter mixture: flour, salt, Dutch cocoa powder, and instant espresso powder. Beat until dough is unified. Using hands, press dough into a ball, kneading gently if needed. Shape dough into a brick: seven inches long, three inches wide, and about ¾ to 1 inch tall. (Please don’t make them thinner in height; the noted size helps cookies retain their moisture and flavor, and prevents a dry, crumbly cookie.) If you’d like, use a rolling pin or board to help flatten dough. Place the dough brick in freezer to firm up. (If not continuing with recipe the same day, wrap the brick well before chilling. Wrapped dough will keep in freezer for a week, or two to three days in the fridge.)

Meanwhile, preheat oven to 350 F. Line cookie sheet(s) with parchment paper; set aside.

In a medium bowl, whisk the remaining scrambled egg with the water. Toss in the cranberries, drained capers and cacao nibs, stirring to completely coat.

Remove dough brick from freezer and slice lengthwise into three equal columns, each one inch wide. Slice rows across the columns at about one centimeter or 1/3 inch. You should have about 16 slices per column, a total of about 48 little cookies.

Place them flat onto lined cookie sheet, 1/2 inch apart from one another. Give the cranberry mixture a good stir, then use a small spoon to top each cookie with a little pile of topping, roughly centered. Try to include no more than two (maybe three) capers per cookie, but plenty of cranberries and cacao nibs — all nicely coated with egg but not overflowing (you want to avoid pooling around the cookies). Stir topping regularly as you distribute it. If using, sprinkle the topped cookies with coarse sanding sugar.

If using more than one cookie sheet, bake one at a time or alongside each other (not layered on different oven racks). Bake cookies for about 10 minutes, until topping does not appear wet and the cookies are fragrant with tiny cracks. Let cool on cookie sheets for at least 10 minutes. Serve completely cooled. Cookies can be stored in a covered container at cool room temperature for up to 24 hours, or refrigerated up to 48 hours (topping will darken as cookies sit).

Maybe next time… Occasionally while eating these, I daydream of an over-the-top addition of dark chocolate drizzled on each little cookie. If capers are too tangy for you, try chopped black olives instead. Finely minced dried apricots could be lovely alongside or in place of the cranberries. Whatever you do, it’s best to not substitute the Dutch process cocoa with the more common natural variety, and don’t omit the instant espresso powder. Also, be sure to use jarred capers in brine that contain neither garlic nor onion – just salt, water, and vinegar. I use non-pareil variety, but I don’t think it would make much difference to use the slightly larger and less potent version.

Posted in Baking with Veggies, Cookies & Bars, Sweets | Tagged , , , , , , , , , , , , , | 2 Comments

Ginger Celery Cake

I was munching (and munching and munching) on a giant bag of homegrown celery when I started daydreaming of turning it into a cake. My green-thumbed friend had been so generous to share his harvest, and these stalks were beautifully fragrant, green and crisp. I knew the celery’s herbal notes and high water content would be welcome in a cake batter, and I imagined fresh ginger could offer a complementary warmth and earthiness.

I decided to grate the celery against the grain, creating small, wet pieces without long strands of fiber. I did the same with the ginger root (also notoriously fibrous), which was surprisingly easy – it didn’t even need to be peeled. My food processor’s grater attachment was a lifesaver, and the batter I created was quite forgiving: all the little strands and fibers bake softly into a pleasant, tender crumb. The whisper of grassy flavor and burst of spice pair wondrously beside vanilla and brown sugar, and the format is delightfully casual and serves a crowd (who – in my experience – can’t get enough of this cake).

Ginger Celery Cake
Serves 12-24. pdf recipe

  • 1 pound fresh celery stalks, leaves and hard stubs removed
  • 5 ounces fresh ginger root, unpeeled
  • 2 cups brown sugar, preferably dark**
  • ¾ cup vegetable oil
  • 4 eggs
  • 1 tablespoon pure vanilla extract
  • 2 cups all-purpose flour
  • 2 teaspoons baking powder
  • 1.5 teaspoons baking soda
  • 1 teaspoon salt
  • 2 teaspoons powdered dried ginger (optional)

Rinse and dry the celery stalks and ginger. Preheat oven to 350 F. Grease a 9 x 13” cake pan and line the inner bottom with parchment; set aside. Using a food processor fitted with a grater attachment, grate the celery crosswise (against the grain of the strands) in batches. It’s easiest to place as many stalks as you can fit vertically in the feed tube, then press down firmly with the pusher while processing.

Repeat with any stalks that have turned sideways or otherwise not grated well; use kitchen shears to mince any lingering large tangles or long strands of celery fiber. Place all grated celery and its water in a glass bowl or measuring cup; you should have a little over two cups. Set aside.

Grate the fresh ginger in the food processor or by hand, re-grating or mincing any very large pieces, and retrieving any stubborn ginger fibers from the back of the grater disc. Set aside. In a separate, large bowl, beat the brown sugar and oil. Add the eggs, beating in one at a time, followed by the vanilla. Sift the remaining dry ingredients over the oil mixture. Stir into a thick, smooth, caramel colored batter.

Quickly assess the amount of water in your grated celery. If the container is filled much more than halfway with water, strain a bit of the water out. You do want a good amount of liquid — water about halfway up the bowl is perfect — whereas, if celery is completely submerged in water, the cake can come out soggy unless you drain some.

Transfer all grated celery with remaining water into batter, followed by the grated ginger. Fold celery and ginger into the batter until evenly dispersed, using a rubber spatula and scraping bottom of bowl. Pour batter into prepared baking pan. Place in preheated oven on center rack. Bake 35-40 minutes or until a toothpick inserted in center comes out batter-free.

Let cake cool completely in pan, covering snugly with foil once cool. Store at room temperature until ready to serve. When ready to serve, loosen sides with a butter knife and invert pan onto platter or cutting board. Remove pan and parchment. Dust with powdered sugar or frost as follows.

Frosting:

  • 8 ounces cream cheese, softened
  • 4 ounces butter, softened
  • 1 teaspoon pure vanilla extract
  • 1 cup powdered sugar
  • 1 pinch salt (omit if using salted butter)

Beat cream cheese, butter, and vanilla until well-blended. Sift the powdered sugar and salt over the mixture. Stir gently to begin to incorporate dry ingredients, then beat well until smooth and fluffy, preferably with a whisk attachment. Slather evenly over room-temperature cake. Slice and enjoy. Cover and refrigerate any leftover frosted cake.

Maybe next time… Ginger is the leading flavor in this cake; feel free to reduce the amount if you prefer less or want to taste the celery more. You can also substitute half or all the salt with celery salt to bump up the celery factor. If you’re up for a workout, feel free to use a handheld grater for the celery and ginger, pressing very firmly and working quickly. If you want to serve this cake straight from the pan, use a safe-to-cut 9×13” cake pan such as glass, and grease & flour the pan instead of using parchment. Feel no obligation to use oil labeled as “vegetable oil;” canola oil or sunflower oil are fine and offer a neutral taste; olive oil works if you don’t mind its added flavor; melted coconut oil is delicious though it changes the cake’s texture slightly.

**This is a lot of sugar, I know. But it’s a big cake with many servings, and the amount of sugar is necessary for its structure. Sugar heats up the batter in the oven and cooks the ingredients into the desired resulting crumb. In my experience, reducing the amount of sugar in this recipe will result in a chewy cake with strands of uncooked celery and ginger. I do not recommend it.

Posted in Baking with Veggies, Cakes & Cupcakes, Sweets | Tagged , , , , | 11 Comments

Peach Paneer Cookies with Cardamom and Bourbon

I live in a city full of delicious Indian restaurants, and my addiction to fresh naan and rich curries is real. One of my favorite common ingredients is paneer: a pressed, mild cheese that never really melts – it just softens, gets toasty, and soaks up all the flavor that surrounds it. Paneer is barely salty (in fact, the kind I buy contains only milk and vinegar); it has a milky, faintly tangy quality that’s pleasant on its own but also is enticing as a blank culinary canvas.

I’ve long thought of paneer as a great dessert candidate, and its sweet possibilities still feel endless. This time, I found myself embracing (or rather clutching) the stone fruit of late summer, and I decided to pair the cheese with ripe, sweet peaches. Then I created a brown sugar cookie with the perfect sturdiness to act as a tiny, edible platter. Its dough would offer a whisper of a warm and refreshing spice: cardamom — another nod to Indian cuisine.

While delightfully creamy and tender, the paneer didn’t do much for the cookies when I added it plain – so I opted to imbue it with a complementary taste, soaking it beforehand in a sweet and salty bourbon marinade. As strange as it might sound, the boozy cheese bits gave the cookies a welcome warmth and a wonderful complexity of flavor and structure.

With a sweet and spicy base, tangy roasted peaches, and toasty, steeped cheese, these cookies are downright satisfying. The succulent baked fruit and crisp, buttery cookie offer a luscious array of texture alongside the slightly chewy toasted paneer. What’s more: their lovely layout is a kind of celebration signal — they look a bit like hors d’oeuvres to be served at a party, and certainly they should be!

Paneer Peach Cookies with Cardamom and Bourbon
[makes about 30 cookies]

For the paneer:

  • 2 tablespoons dark brown sugar
  • ½ teaspoon salt (omit if paneer is salted)
  • 5 tablespoons bourbon
  • 5 ounces paneer cheese, cut into 1 centimeter cubes

For the cookie dough:

  • 1/3 cup unsalted butter, softened to room temperature
  • ¾ cup dark brown sugar, firmly packed
  • 1 egg
  • 1 teaspoon pure vanilla extract
  • 2 ¼ cups all-purpose flour, plus more for rolling & cutting
  • ½ teaspoon salt
  • 1 ¼ teaspoons baking powder
  • 1 ½ teaspoons ground cardamom

For the peaches:

  • 2 tablespoons corn starch
  • 2 tablespoons dark brown sugar
  • 1 ½ – 2 pounds (about 3-4) peaches, ripe but not too soft
  • 1 teaspoon lemon juice

Marinate the paneer: In a small bowl, whisk 2 tablespoons brown sugar, ½ teaspoon salt (if using), and bourbon. Add the cubed paneer and toss. Cover and chill. Let marinate at least 6 hours ahead of baking, up to 24 hours. Occasionally uncover and stir.

Make the cookie dough: Beat butter and sugar until blended and fluffy. Add the egg and beat well, followed by the vanilla. Sift 2¼ cup flour along with the salt, baking powder, and cardamom into the bowl. Mix until all ingredients are incorporated and dough begins to stick together (it will look a bit crumbly at first). Gather dough with hands and knead for a few seconds if needed, then form into two equal balls. Wrap each one tightly with plastic wrap; this will prevent drying.

Prepare the peaches: Whisk the corn starch and brown sugar in a small bowl; set aside. Rinse, dry, and pit the peaches, then cut into ½” to ¾” cubes. Toss the peach pieces with the lemon juice, then add the corn starch mixture, stirring until just coated.

Preheat the oven to 375 F. Line cookie sheets with parchment. Strain the paneer and place cubes on a paper towel. (Discard boozy liquid or try using it in a creamy cocktail.)

Unwrap half of the cookie dough. On a flat, lightly floured surface, use a floured rolling pin to roll the dough into a slab 1/8” to 1/6” thick. Use a floured 3” round cookie cutter to cut dough into circles, transferring each one to a lined cookie sheet, about ¾ inch apart from one another (they won’t spread much). Re-roll dough scraps and re-flour surface and tools as needed. Repeat with second half of dough.

Being careful to not transfer too much liquid to the cookies (a slotted spoon is great), top each cookie with about a rounded tablespoon of peaches followed by a rounded teaspoon of paneer cubes, centered. This is about 4-5 cubes of each: paneer and fruit. Discard leftover juice from peaches. Bake one sheet at a time for 10 to 12 minutes, until edges of cookies are golden brown and paneer begins to look toasty.

Remove from oven and let cool for at least 5 minutes on cookie sheets. Enjoy while still warm, or at room temperature the same day they’re baked. (If you have leftover cookies at the end of the day, cover and refrigerate, eating within 24 hours. In the fridge, the baked paneer will become quite firm and the peaches will likely become brown, but the cookies will taste fine the next day.)

Maybe next time… If you like the idea of incorporating cheese into dessert, check this out. Feel free to make the cookie dough a day ahead of time, such as when you start marinating the paneer; keep it chilled, then let it warm to room temperature before rolling. Indian or Pakistani grocery stores carry paneer, as does my local Whole Foods. You can also make your own paneer if you’re feeling adventurous. But of course you don’t have to use paneer at all – you can skip the cheese all together, or swap in a mild crumbled goat milk or feta (no marinating necessary). In fact, the cookie dough alone is simply fantastic for baking flavorful cut-out cookies; it’s the perfect texture and really holds its shape. It also works for thumbprints stuffed with jam like apricot or raspberry — or better yet, peach!

Posted in Baking with Spirits, Cookies & Bars, Sweets | Tagged , , , , , , , | 5 Comments