Paying Favorites Forward: The Liebster Award

A few weeks ago, I was very honored to be given the popular Liebster Award from Robin of Bringing Home Europe.  Robin’s blog is incredibly inventive and enjoyable; she shares “traditions and tidbits” from her past travels in Europe — from recipes to rituals to decorations and much more. Her blog reminds me of the magical, well-known, nostalgic feeling that comes with traveling: we return home, but we are ever changed and can never completely shake away our experiences abroad. Plus, Robin’s love for Polish pottery won me over as soon as I saw her post about it. I’ve never been to Poland, but I have always had a soft spot for their pottery, and I cherish my few little pieces of it. Simply put, it’s nice to be connected with a mutual Polish pottery enthusiast and fellow blogger across the country.  Sometimes it’s the little things, you know?

As you may know, Liebster means “favorite” in German, and the award with this name is just what you would imagine: it’s a way to honor your favorite blogs.  I don’t know where or when the Liebster Award started, but from what I hear, it is to be given to 3-5 of one’s favorite bloggers who have fewer than 100* followers.  To accept the award, the recipient chooses his or her own Liebsters, writing a post that both names those favorite blogs and mentions the one from which the award came.  I’ve already talked about the generous giver of my award, so it’s time to pass it on.  Drum roll, please…1.) Life Seeking Beauty.  First of all, I adore the name of this blog. I’m a longtime advocate of rescuing beauty from its contemporary, shallow definitions and of recognizing it in its fuller, more sacred, often subtle ways of surfacing. For me, this blog exemplifies an unexpected way beauty can surface, as its author — a true introvert in real life — is so wonderfully open and honest in her writings here. Whether she’s sharing her goals, her frustrations, her faith, or her favorite things, Elizabeth is unguarded and unashamed in her writings.  Even those of us who lean toward being extroverts are rarely brave enough to be ourselves so candidly and to share our daily lives with such courage, and surely, beauty.

2.) Emmy Cooks.  Emmy is a Seattle mom who started her blog to refresh her love for cooking.  She posts a new recipe and photos every single day!  I don’t know how she does it, especially with three kids.  I am truly impressed not only by the frequency of her blog posts, but also by their content.  Her recipes are always varied — from dessert to homemade pasta to vegan dishes — which, in combination with her upbeat writing style, make for an uplifting read.  Plus, Emmy makes cooking seem easy and un-intimidating, and she is refreshingly realistic; in her own words, “mostly wholesome, mostly vegetarian, always delicious real food.”

3.) My Sleepy Kitchen.  As its author puts it, this is “a blog about a wheat lover’s adventures in gluten free cooking as a tool to overcome Chronic Fatigue”.  I am so inspired by Sarah, who was diagnosed with the syndrome in 2011 and, in response, embraced a gluten-free, whole foods diet — and is now on the road to recovery.  With beautiful photos, delicious-looking recipes, and poignant posts, Sarah’s blog shares her research with others and offers a creative expression of how she’s taken her health into to her own hands.

4. and 5.) These spots were reserved for two of my favorite blogs, Krug the Thinker and Dining with Dostoevsky, but alas, they have both received the Liebster award already (no surprise there!). With my rather overzealous commenting, I trust they know they are two of my favorites already.  So I will just say that if you’re in the mood for the musings and makings of creative intellectuals, you won’t want to miss these blogs!

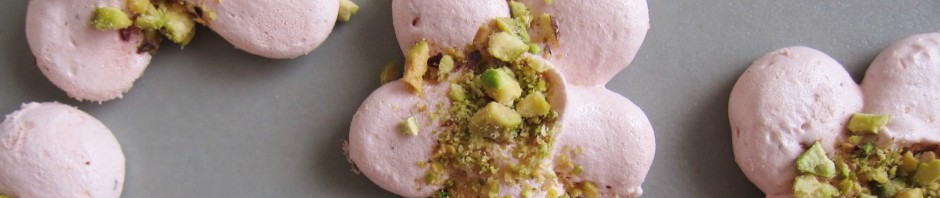
Many thanks again to Robin from Bringing Home Europe for honoring me with the Liebster Award and for giving me this opportunity to pass it on!  And to everyone I named above, I send you my warm wishes, my gratitude for the entertainment and inspiration you’ve given me, and a wholehearted, enthusiastic (and, naturally, sweet)       high five!

*I read somewhere that the blog being given the award should have fewer than 100 followers, but I have since seen the number mentioned as 200 and even 300!  In any case, this can be a tricky requirement to meet, as many blogs don’t display their quantity of followers.  I did the best I could here!

Posted in Sweets | Tagged , , , , , , , , , | 16 Comments

Carrot Cookies: Eat With Enthusiasm

When I last visited my sister in Washington, one of the highlights of my stay was taking my 6 year old nephew to a bakery after school on a rainy afternoon. He knew what he wanted as soon as he saw it: a whoopie pie. It was a traditional one: jumbo hamburger-sized and constructed with two round, spongy chocolate cakes surrounding a white cream filling. He enjoyed each bite of it with shameless enthusiasm, growing stickier and gigglier with every nibble.

When I got home and found myself missing my nephews, I did something I knew would lift my spirits: baking therapy.  A creative, colorful process and the magnificent aroma of sweet spice were sure to soothe my soul.  And they did.  But aside from being sandwich-style, the cookies I made were very little like whoopie pies at all – not cakey or huge or chocolate.  Instead, they were chewy, spicy, small, and full of texture. Allow me to introduce them.

Chewy carrot spice cookies (Makes about 18-20 little cookie sandwiches)

  • 1/3 cup sugar, preferably brown
  • 1 tablespoon melted butter
  • 1 medium egg white (1/8 cup)
  • 1 teaspoon pure vanilla extract
  • 1 cup flour
  • 1.5 teaspoon baking powder
  • ½ teaspoon salt
  • 2 teaspoons ground ginger*
  • 1 teaspoon ground cinnamon
  • ½ teaspoon ground cloves
  • 2 cups grated raw carrots, packed (about 10.5 ounces in weight)

Preheat oven to 350 F.  Line 2 large cookie sheets with parchment paper.  In a large bowl, whisk together the sugar, butter, egg white, and vanilla until blended and smooth. Using a sifter or sieve over the sugar mixture, add flour, baking powder, salt, and spices. The dough will be dry; mix until ingredients are evenly distributed. Add carrots (I find it best to use bare hands), mixing them in until fully incorporated.  Drop dough by the heaping teaspoonful onto lined parchment to make 38 cookies or so. Gently push down the center of each dollop of batter with the back of a spoon. 

Bake for about 20 minutes, until edges and bottoms are beginning to brown. Remove from oven and let cool completely on cookie sheets.  (At this point, the cookies might seem boring, and maybe even a little rubbery – but have faith. They need this structure to contain a rich filling, which will add a delightful, creamy texture contrast.)

Filling: Whip together 6 ounces cream cheese and 2 tablespoons butter (both at room temperature). Beat in 1/2 teaspoon pure vanilla extract. Sift or sieve over it: 1/3 cup powdered sugar and 1/2 teaspoon ground cinnamon and mix. Place a heaping teaspoonful of the filling onto half of the cooled cookies. Top each of these with another cookie to make a little sandwich.

Soft and chewy, spicy and sweet, these carrot cookies are delicious at room temperature or, better yet, chilled. While I don’t think my enthusiasm could ever surpass my nephew’s feelings for a traditional whoopie pie, I certainly ate these cookies with outward satisfaction, as did the others who tried them.  Store them in them in fridge, eat them within a day or two, and give a salute to a child who could teach you a thing or two about how to enjoy a rainy afternoon.

Maybe next time… *I was in the mood for a lot of ginger when I made these. If you’d rather reduce the ginger or use cinnamon, cloves, nutmeg or allspice instead, feel free!  Also, I think a half-cup of toasted, chopped nuts or any kind of raisins would be a wonderful addition to these cookies, or – naturally – a handful of finely chopped candied ginger. If you want to make them healthier, you could make a filling out of Greek yogurt instead of cream cheese (just be sure they stay refrigerated at all times).  Enjoy!

Posted in Baking with Veggies, Cookies & Bars, Sweets | Tagged , , , , , , , , , , , , , , , , , , , , , , | 19 Comments

Peppermint Leaf Meringues

Eggs are important. I’ve written about them before, but having recently seen them on Easter and Passover plates alike, I now welcome a renewal of my reflection on them.  The symbolism of an egg is powerful, offering meaningful messages about new life, fragility, and much more.  Their nutritional provisions are also quite amazing, so it’s really no surprise that eggs get regularly replicated in art, included in religious ceremonies, and breathtakingly decorated.  And so it is in honor of eggs that I recently created a simple but delectable treat: peppermint leaf meringues.

On the one hand, meringues seem easy to make, calling for just a few basic ingredients. On the other, they require some precision and a few hours of time at home, but they are worth it. Trial and error has taught me that many meringue recipes are designed for drier climates than mine. After finally mastering perfectly beaten whites, and after staying patient during the hours of drying time that meringues require, it is a real disappointment to open the oven and find sticky little piles of goo instead of the anticipated light, crisp treats. So I finally made a recipe tailored to those of us in more humid areas (which works just as well in drier climates) — a method that yields crisp, little puffs of sweetness and a refreshing garden mint flavor.

Peppermint Leaf Meringues
(Makes 36 small meringues, filling one large cookie sheet)

  • ½ cup sugar, at room temperature (If you’re like me and refrigerate your sugar to avoid ants, be sure to let it warm up; cold sugar flattens the whites.)
  • 2 large egg whites (1/4 cup), at room temperature
  • ¼ teaspoon cream of tartar (It helps the whites volumize.)
  • ¼ teaspoon peppermint extract (It’s potent! This little amount is plenty to subtly highlight the flavor of the mint leaves)
  • 1 heaping tablespoon minced peppermint leaves, loosely packed*
  • Chocolate chips (optional)

Wash, dry, and finely mince the peppermint leaves; set aside. Line a large cookie sheet with parchment paper. Preheat the oven to 200°F. Beat egg whites with an electric mixer on medium-high until they are foamy with bubbles. Add the cream of tartar and turn up the speed to high. When the whites begin to lose their transparency, slowly sprinkle in half the sugar, keeping mixer on. Add the extract, then sprinkle in the remaining sugar. After another 30 seconds on high, turn off mixer. The batter should be thick, shiny, and opaque white. Gently fold in the peppermint leaves, just until evenly distributed.

Transfer the batter to a pastry bag or plastic bag with a corner cut off.  Pipe the batter into small dollops on the parchment paper. (With their sweetness and airy texture, I think of meringues as a candy more than as a cookie, so I keep them small: about the size of a halved walnut shell. If you opt to make them bigger, you’ll need to bake them longer than this recipe suggests.)  Be careful not to let the piped dollops touch each other, but don’t worry about keeping them too far apart; they shouldn’t spread much. If desired, top each meringue with a chocolate chip before baking.

Bake for 60-75 minutes**. At this point, meringues should have a matte finish and be a bit cracked. Turn off the oven and leave meringues there for 15 minutes, then open the oven door a few inches and let both the oven and meringues cool to room temperature — about an hour.  (I do not suggest leaving the meringues in the oven overnight like some recipes say, let alone any longer than necessary to let them cool.)  Making sure they are no longer warm to the touch, store meringues in an airtight container such as a cookie tin, and keep them there whenever they’re not being devoured.

Peppermint leaf meringues are light and little, but they satisfy with sweetness and an unusual, refreshing, natural minty flavor.

Maybe next time… For a more festive looking meringue, if desired, add a few drops of green food coloring when you add the second round of sugar, or adorn them with sprinkles before baking. Just remember to avoid any type of coloring or extract that contains oil (meringue’s structural enemy).

*If you don’t have peppermint leaves, feel free to omit them, and add no more than 1-2 more drops extract. (While the leaves add a mild, organic minty flavor to these treats, the strongest minty essence comes from the extract.)

**If you live in a drier area, 75 minutes might be too long (which will simply result in a toastier-colored meringue from the caramelized sugar). You might try pulling a meringue off a cookie sheet at the 1 hour mark and letting it cool; if it’s dry and not gooey, turn off the oven at this point.

Posted in Baking with Herbs, Cookies & Bars, Sweets | Tagged , , , , , , , , , , , , , , , , , , , , , , , , | 8 Comments

Mimosa Meets Mimosa: A Cupcake Story

When I recently came across beautiful candied mimosa flowers, I was excited about their cake-topping potential but felt skeptical about how the flowers might taste. For one, I’d never heard that mimosa flowers were edible; also, despite my adventures with nasturtiums and lavender, I still lack a certain confidence when it comes to baking with flowers. But I couldn’t get the adorable image out of my head: the round, sugar-coated, bright yellow flower atop a mini cupcake! Soon I was reaching into my shopping bag for a taste of the flowers. They surprised me pleasantly with their sweet crunch and mild, momentary floral flavor.

While candied mimosa flowers taste nothing like a mimosa cocktail, I noticed immediately that their characters were quite similar: delicate, celebratory, summery. After all, the refreshing mixture of champagne and orange juice is quick to signal relaxation: one imagines brunch on a day off, perhaps following a festive evening. The flowers, meanwhile, might remind one of little suns: tiny bursts of vibrant yellow growing in the fresh air. Together, both types of mimosas inspired this recipe, where champagne and oranges are paired with mimosa flowers: a natural match both in name and essence. Here is how I made them…

Mini Mimosa Cupcakes (makes about 36-40 mini* cupcakes)

  • 1 ¼  cup flour, sifted
  • 1 teaspoon baking powder
  • ½  teaspoon salt
  • 2 egg whites
  • 1 egg
  • ¼ cup vegetable oil
  • Scant ¾ cup sugar
  • 1 teaspoon pure vanilla extract
  • ½ cup fresh champagne
  • Finely grated zest of one large orange

Preheat oven to 325 F.  Line mini muffin pans with cupcake liners.  Sift together first three ingredients; set aside. With an electric mixer, beat egg, egg whites, zest, oil, sugar and vanilla on medium speed until pale and well blended (about 2 minutes). Turn mixer to low and add the flour mixture gradually until fully incorporated. Finally, add the champagne and mix until the batter is just even in consistency. Pour into lined pan, filling cups 2/3 full. Bake for 11-13 minutes, until batter has just stopped bubbling, a toothpick tests clean, and tops of cupcakes are firm and bounce back to the touch. Let cool completely before frosting.

Mimosa Meringue Frosting**

  • Candy thermometer
  • 3 egg whites
  • 3/4 cup plus 1 tablespoon sugar
  • 1 tablespoon clear corn syrup
  • 1/3 cup champagne/strained orange juice, mixed
  • Candied mimosa flowers (optional)

With an electric mixer (preferably free-standing), beat egg whites on medium-high until frothy and opaque. Add 1 tablespoon sugar; keep beating until soft peaks form. Separately, fill a 1/3 cup measure with about half champagne, half strained orange juice (freely adjust this ratio according to which flavor you prefer more of).  Pour juice mixture into a saucepan and whisk in 3/4 cup sugar and corn syrup. Using a candy thermometer, bring to a boil until temperature just hits 230 F.  Remove from heat immediately, and with egg white mixture beating, slowly pour the syrup into the whites. Keep beating on high until bowl is no longer warm, but is room temperature to the touch; this should take about 8-10 minutes. If desired, add a drop or two of orange food coloring toward end of beating process.  Before frosting gets too dry, pipe or pile it onto cooled cupcakes and top each one with a candied mimosa flower. These cupcakes taste best at room temperature, but keep them chilled if not eating within 8 hours or so.

Mini mimosa cupcakes are spongy, citrusy, soft, and mild. Full of tiny air bubbles, hints of champagne, and bits of orange zest, they impart the flavor and the feeling of drinking a mimosa. The little flowers of the same name – whether growing in the sun or readily candied for eating – offer a hint of sunny weather and the sweetness that so often comes with it.

Maybe next time…

*These cupcakes are also delicious at standard size instead of mini.  Just fill the cups 2/3 full, and increase the baking time by 5 minute increments — watching carefully for doneness.  Recipe should yield about 12-20 standard size cupcakes.

**Since the cake batter contains no milk or butter, I wanted to make a dairy free frosting for wider edibility, and this one was especially fitting because of its delicate texture. If you prefer whipped cream or your favorite vanilla frosting, I’m sure it would be equally delicious and possibly simpler to make.  Note: My frosting recipe here makes plenty extra!


Posted in Baking with Flowers, Cakes & Cupcakes, Sweets | Tagged , , , , , , , , , , , , , , , , , , , , , , | 9 Comments

At the Opposite of Autumn: Apple Cookies

2014-10-15 17.41.33

I realize we’re at the opposite point on the calendar from apple season, but I can’t help thinking of my favorite time of year amid this relentless rain. After all, the warmest time in Berkeley tends to be autumn: weeks that are refreshingly colored with sun and falling leaves after a foggy summer. I admit I’m spoiled — not only is Bay Area weather reputably mild; we also have access to local and organic apples all year long. So why not evoke the fall, with its golden glow and end-of-summer warmth, by baking my favorite apple cookies today? Full of juicy apples, plump raisins, warm spices, and crisp corn flakes, these cookies have a casual (if ugly) look. But don’t that that deceive you; they sparkle with amazing flavor and texture.

Apple Cookies (makes about 4 dozen)

  • 2-3 medium apples
  • ¾ cup sugar, divided
  • 1 cup raisins
  • various ground spices: cinnamon, nutmeg, ginger, cloves, etc.
  • ¾ cup (1.5 sticks) butter at room temperature
  • 1 large egg + 1 egg white
  • 1 teaspoon pure vanilla extract
  • 1 teaspoon baking powder
  • 1/8 teaspoon salt (omit if using salted butter)
  • 1 cup flour (all-purpose, whole wheat, or a gluten free blend all work well)
  • 4 cups cornflakes, divided

Wash, core and cut apples into cubes about 1/3” square. There should be a little over 2 cups (weighing 11-12 ounces) once chopped. Place apples, raisins, and ¼ cup of the sugar in a saucepan over low/medium heat. Sprinkle liberally with spices. (I admit, I don’t measure. My general rule of thumb is that ginger and cloves can be potent, so use less of them and more cinnamon and nutmeg.)  Cook, stirring occasionally, until apples soften a bit and the mixture becomes sticky with a visible syrup — about 8-10 minutes.

Remove from heat and let cool to warm room temperature.  While mixture cools, preheat oven to 375 F.  Line 2-3 cookie sheets with parchment paper.  Crush two cups of the corn flakes coarsely; there should be 1 cup once they are crushed.  In a separate, large bowl, mix the butter and remaining half cup sugar until creamy and smooth.  Add the egg, egg white, and vanilla and stir until even in consistency. Using a sieve or sifter over the butter mixture, add the flour, baking powder, salt (if using), and a few more dashes of spices.  Alternate adding the crushed corn flakes and the cooked fruit to the batter by hand.  Mix until just fully incorporated, then add the remaining 2 cups whole corn flakes, stirring them in gently until just combined.  Scoop dough into cookies a little smaller than golf balls, weighing about .75 ounce each.  Squeeze each one gently so it holds together while baking. Line them up on the lined cookie sheets with at least 1.5 inches between cookies, and bake for about 12 minutes. They’re done baking when the corners of the cornflakes are toasty and bottoms of cookies are nicely browned. Let the cookies cool on the cookie sheets for about 10 minutes before transferring them to a plate, container, or mouth.  These cookies have the best texture the same day they’re baked (and are especially delicious when still slightly warm) but still have a great flavor the day after.

While they’re baking, these wondrous apple cookies fill the house with a delicious, spicy aroma that foreshadows their incredible taste.  Their bits of tender fruit offer a succulent contrast to their crisp bits of cornflakes and toasty edges.  At once chewy, hearty and light, they just might remind you of the brilliantly varied seasons we get to experience on this incredible planet, no matter what the weather brings.

2014-10-15 17.43.03

Posted in Cookies & Bars, Sweets, Traditional with a Twist | Tagged , , , , , , , , , , , , , , , , , , , , , | 2 Comments